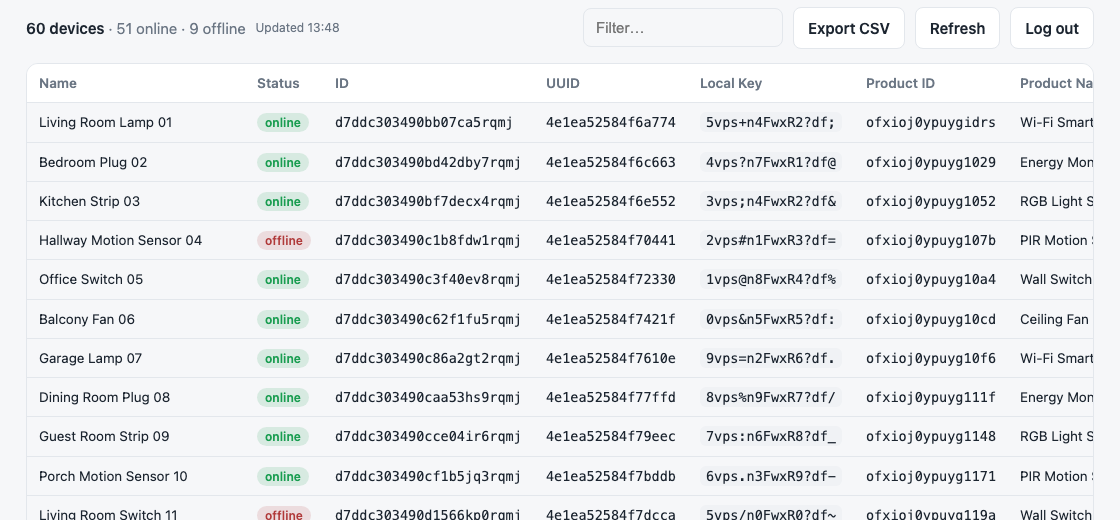
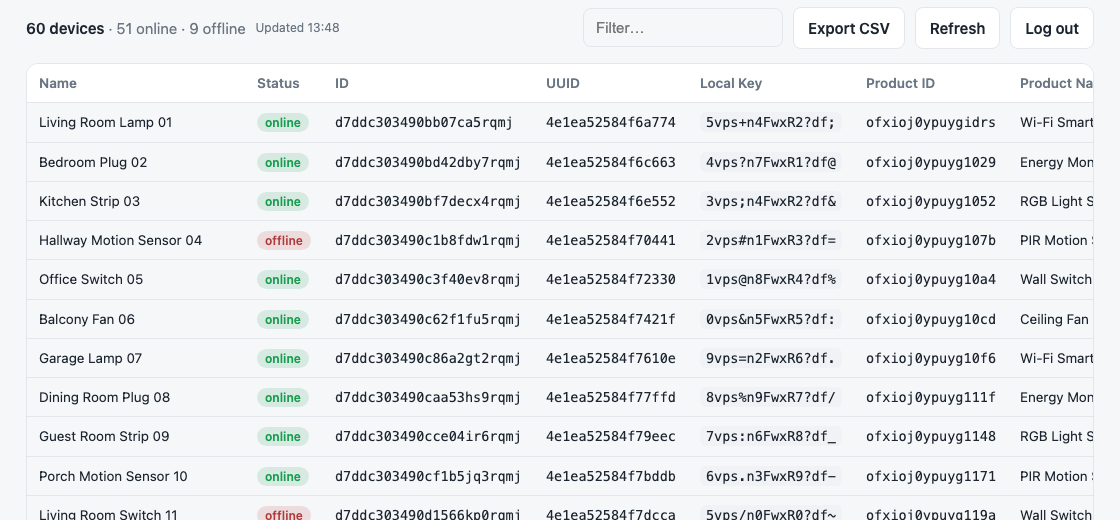
Tuya Local Key helps you retrieve the local keys for devices in your Smart Life / Tuya account, along with device ID, UUID, product details, category, IP address, online status, and timestamps.
It uses QR-code login through Tuya's official tuya-device-sharing-sdk, using Home Assistant's public device-sharing app registration. You do not need a Tuya IoT developer account, cloud project, Access ID, or Access Secret.
Use it as a self-hosted web UI with Docker or as a local CLI tool.
Features
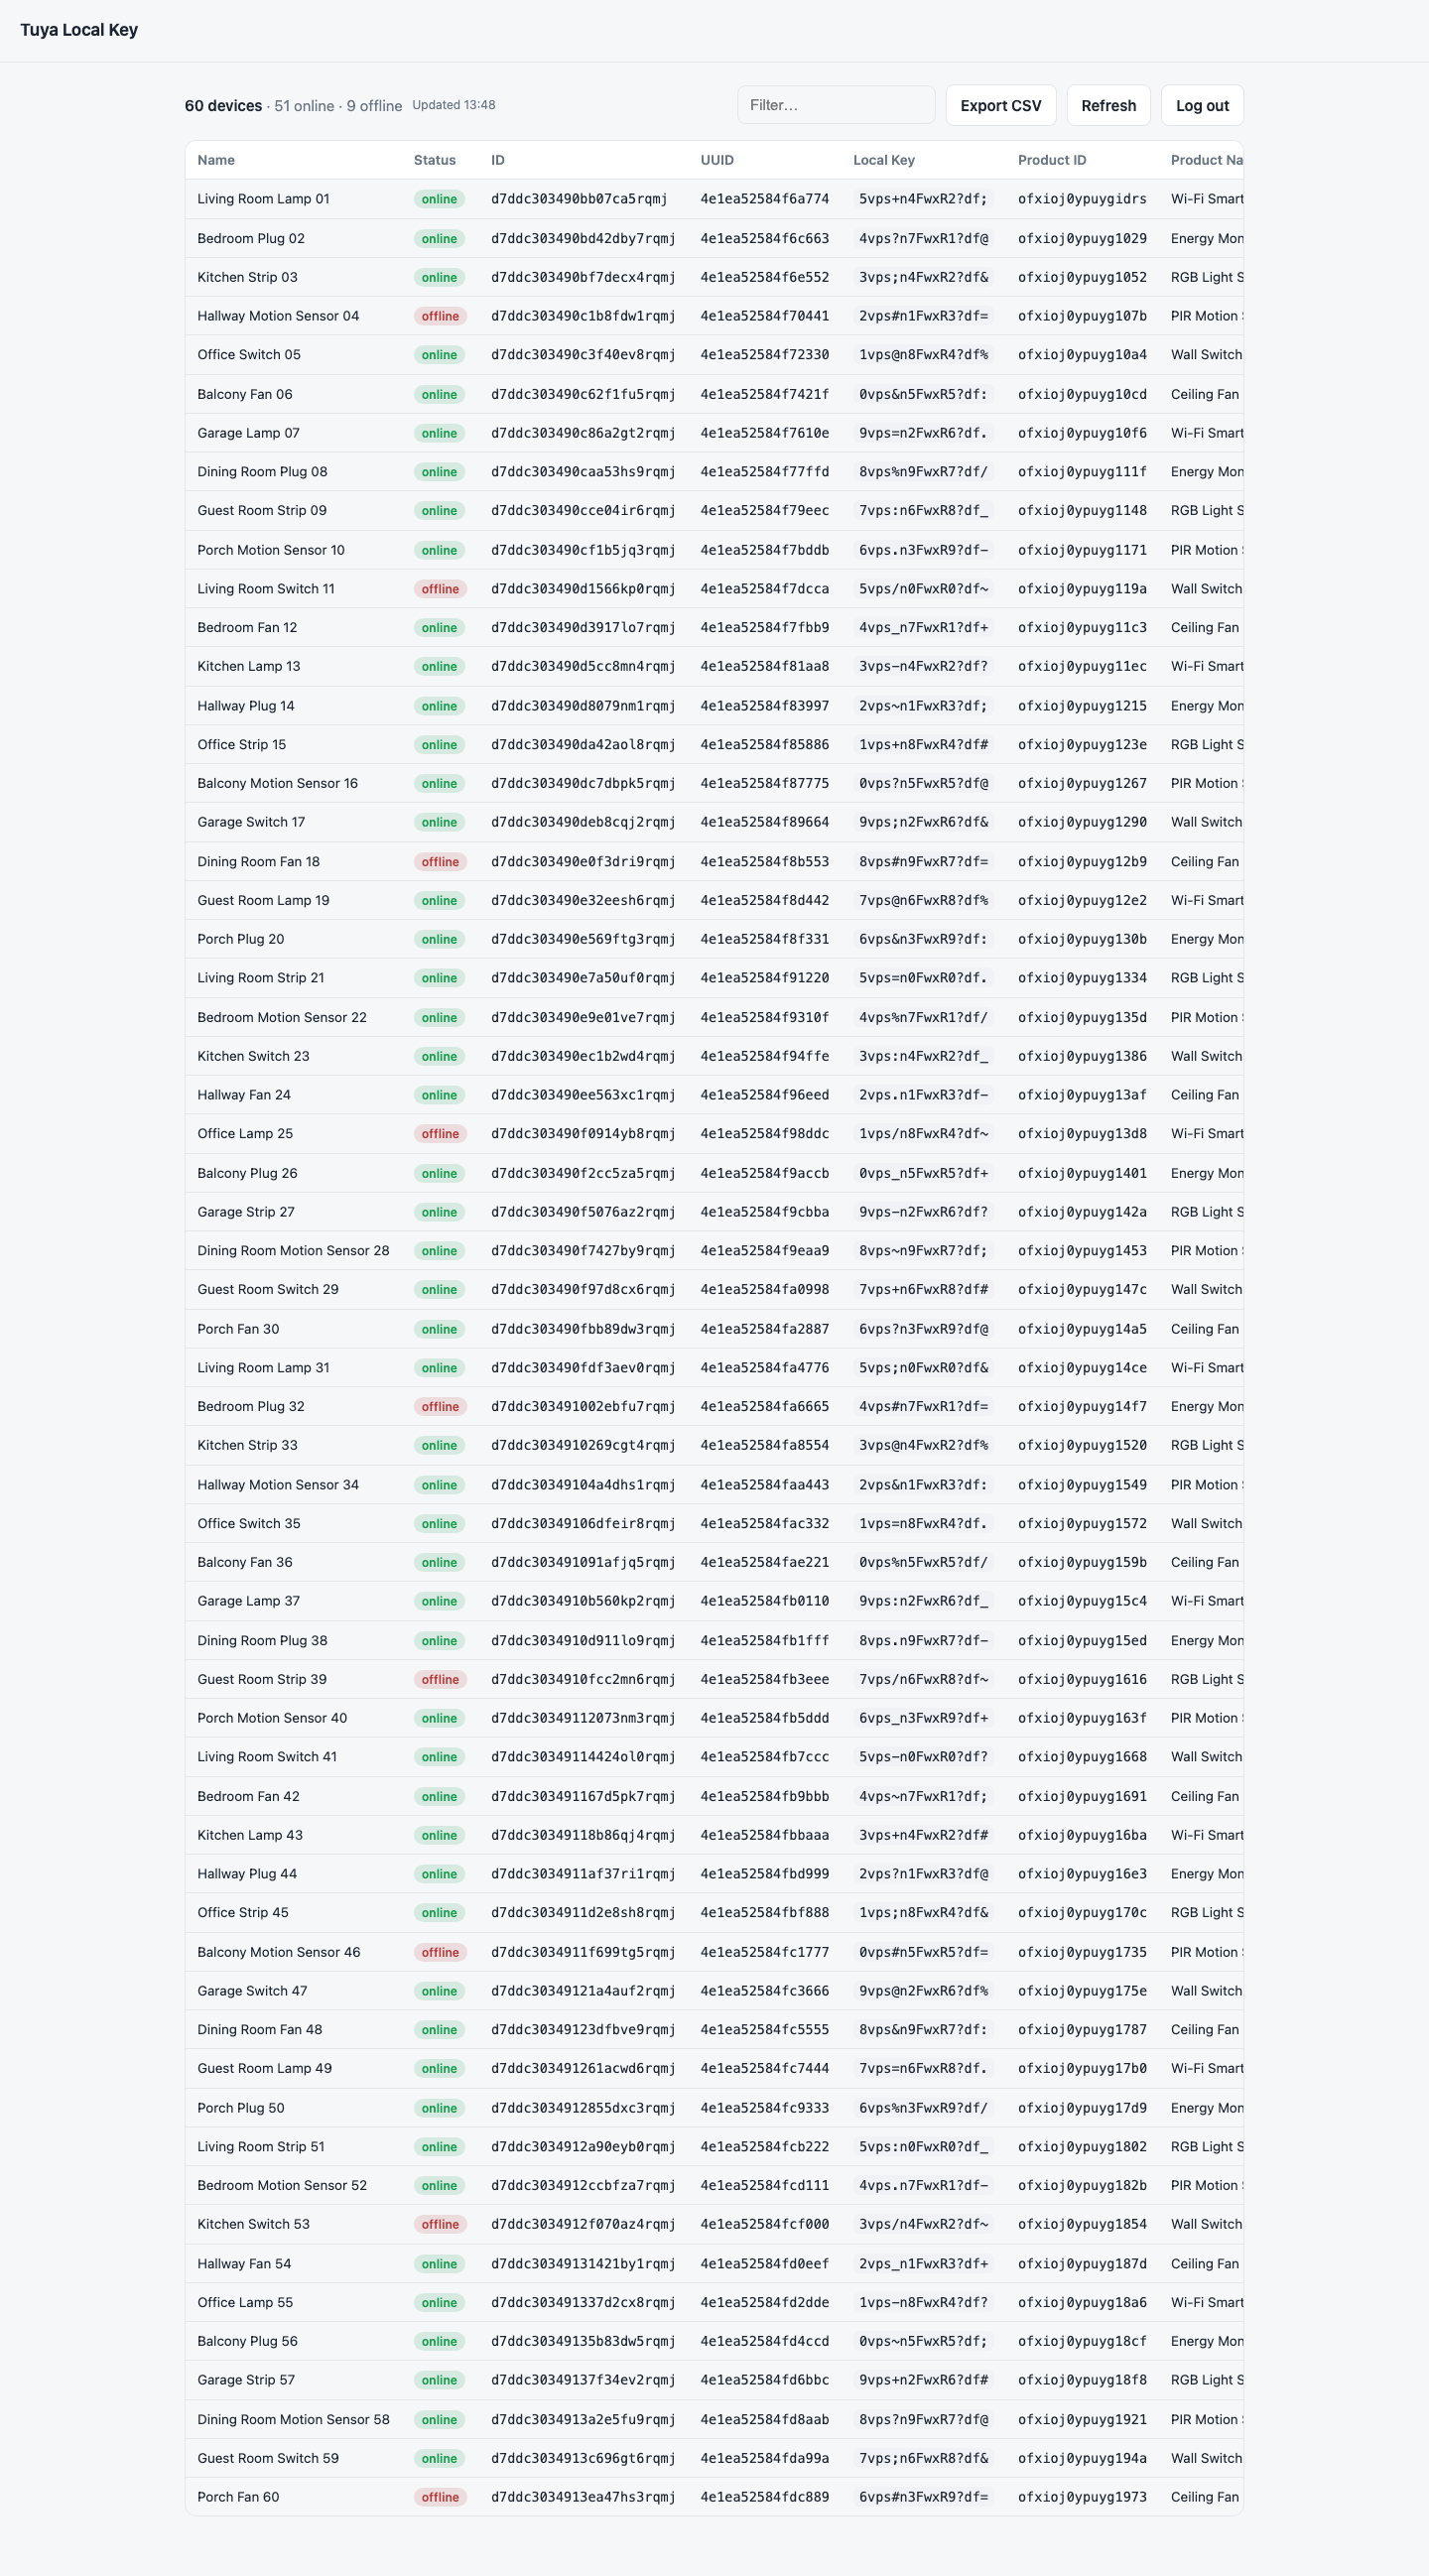
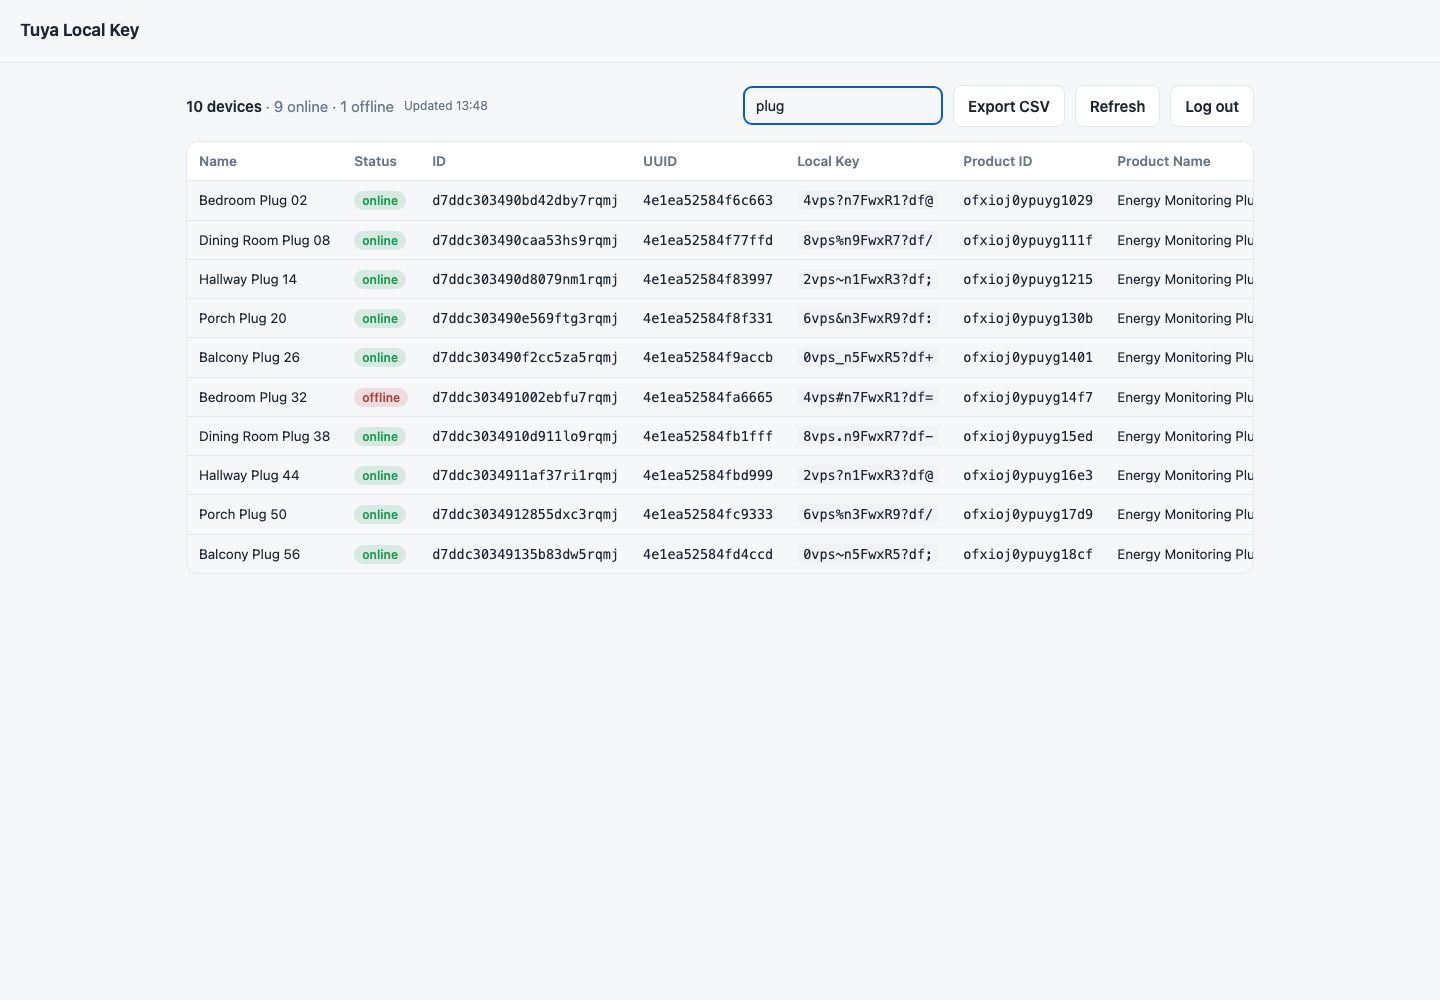
- Web UI for QR login, device listing, filtering, local key copy, refresh, logout, and CSV export.
- CLI with the same QR login flow for terminal use.
- Session caching so you do not need to scan a QR code every time.
- Docker and Docker Compose support.
- Home Assistant app support.
- GHCR publishing workflow for multi-architecture images.
Home Assistant App
Home Assistant OS users can install Tuya Local Key as a Home Assistant app.
- Go to Settings > Apps > App Store.
- Open the menu in the top-right and choose Repositories.
- Add this repository URL:
https://github.com/vineetchoudhary/tuya-local-key
- Install Tuya Local Key from the app store and open it from the sidebar.
The app uses Home Assistant ingress by default. The direct 8000/tcp port is disabled unless you explicitly enable it in the app network settings.
Web UI with Docker Compose
The included docker-compose.yml runs the published GHCR image and stores the cached login session in a named Docker volume.
Start the app:
docker compose up -d
Open the web UI:
http://localhost:8000
If you prefer the tuyaSmart QR scheme instead of smartlife, edit QR_SCHEME in docker-compose.yml.
Web UI with Docker
Run the published image directly:
docker run -d --name tuya-local-key -p 8000:8000 -v tuya-session:/data ghcr.io/vineetchoudhary/tuya-local-key:latest
Build and run locally:
docker build -t tuya-local-key .
docker run -d --name tuya-local-key -p 8000:8000 -v tuya-session:/data tuya-local-key
Then open http://localhost:8000.
Web Login Flow
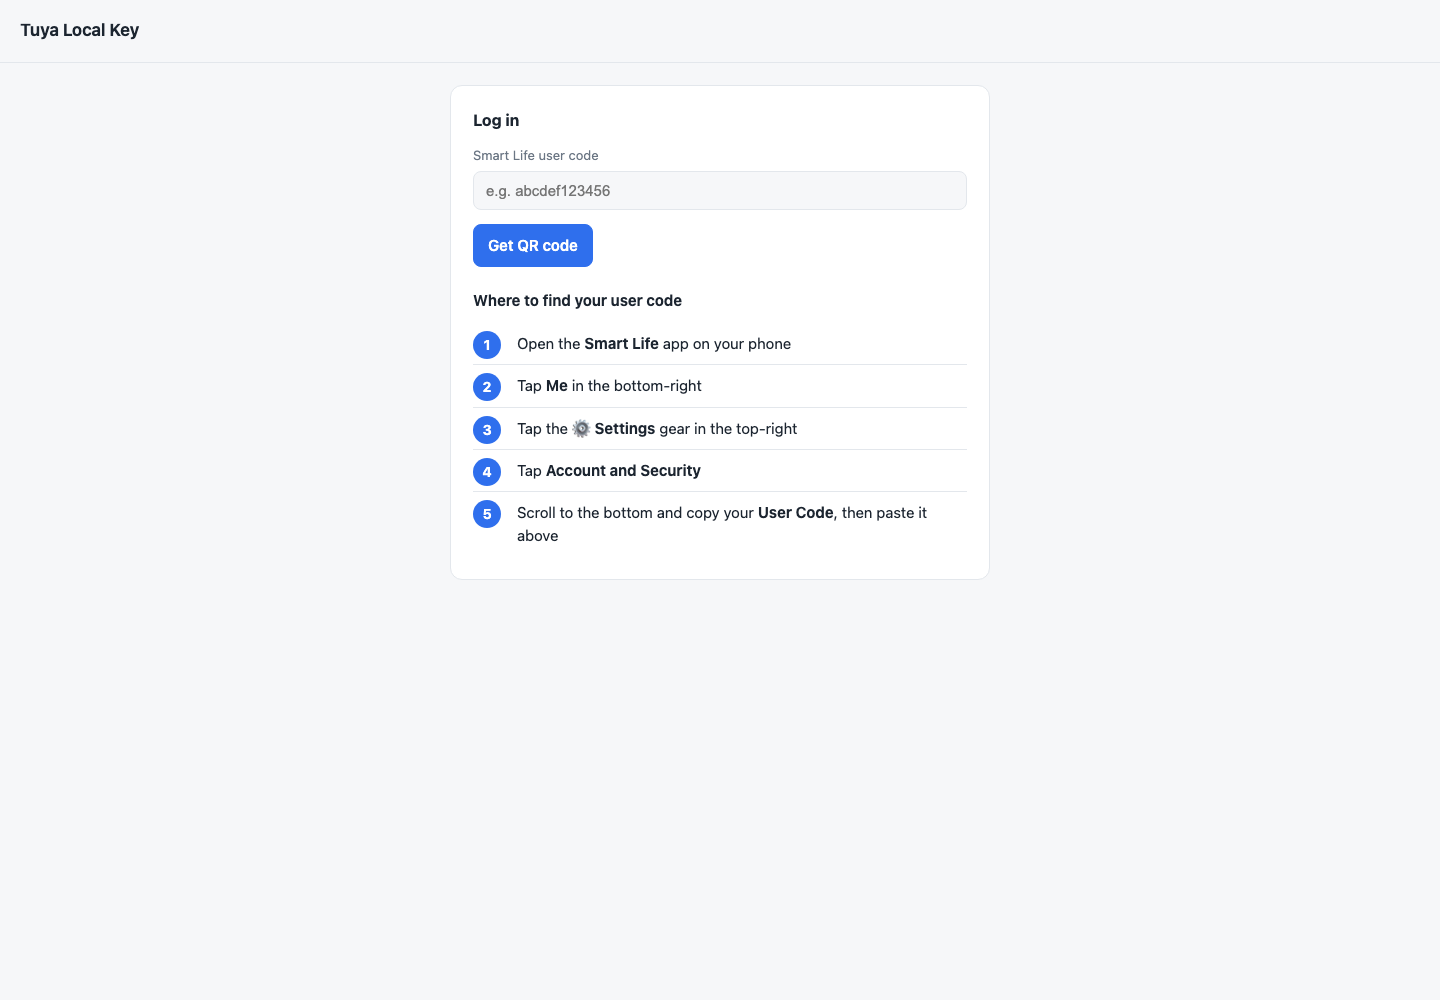
- Enter your Smart Life user code.
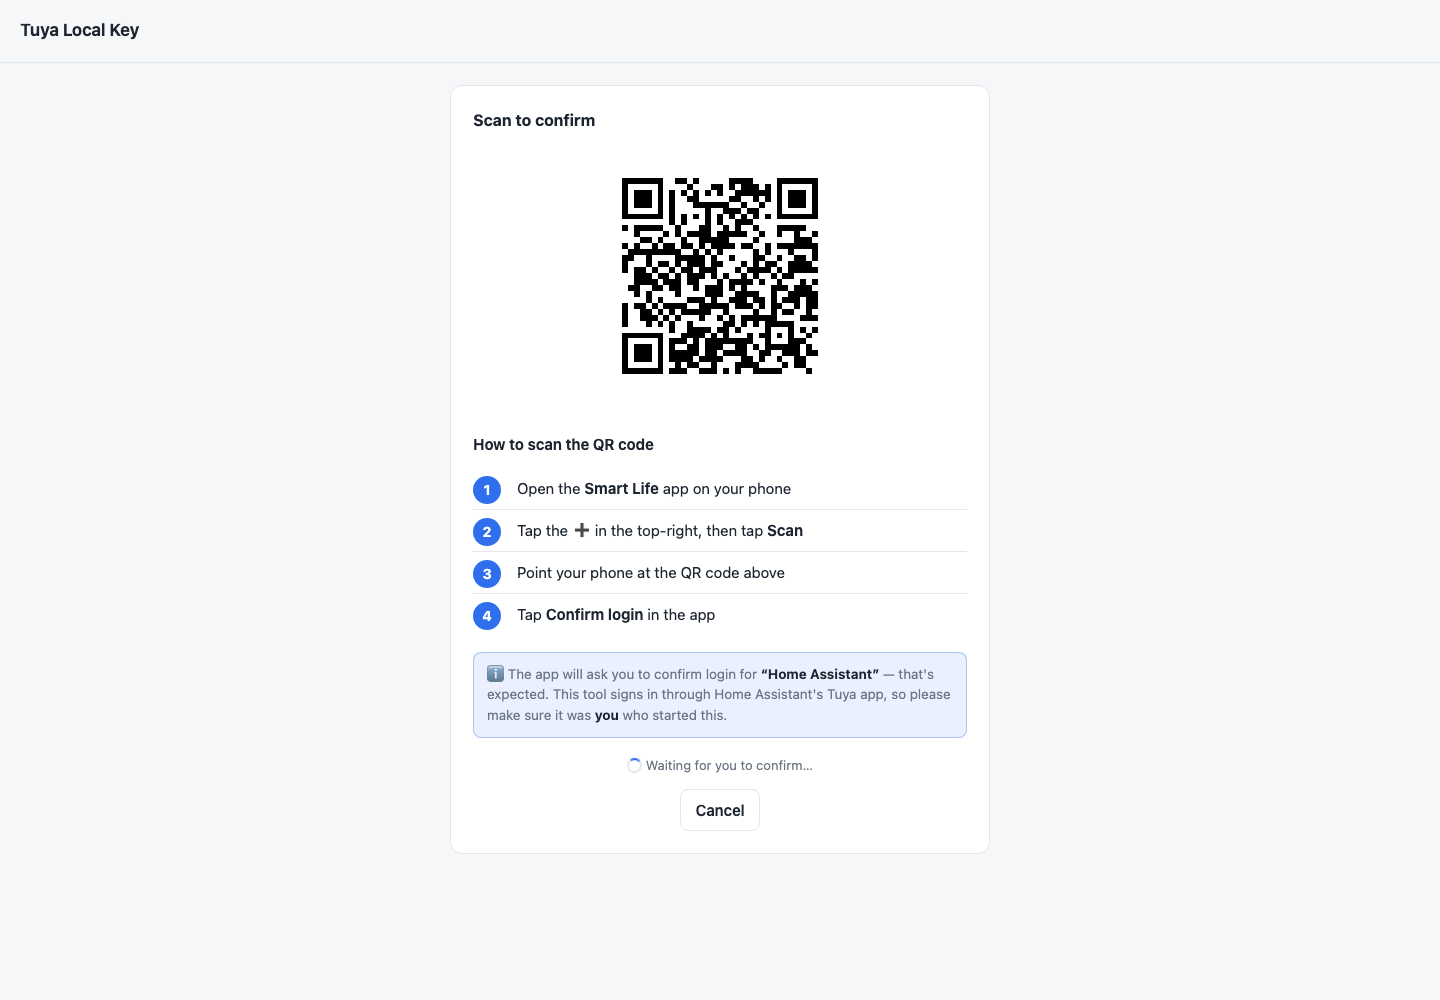
- Scan the QR code in the Smart Life app.
- Tap Confirm login in the app.
- View, filter, copy, refresh, and export your devices.
The web UI caches the device list for 24 hours. Click Refresh to get the latest list from Tuya.
Configuration
| Environment variable | Default | Description |
|---|---|---|
SESSION_FILE |
/data/session.json |
Path where the cached login session is stored. |
QR_SCHEME |
smartlife |
QR prefix. Use tuyaSmart if scanning or confirmation does not work for your account. |
PORT |
8000 |
Server port used by the Flask development server. The Docker image listens on 8000. |
AUTH_USERNAME |
(unset) | Username for optional HTTP Basic Auth. Login is required only when both AUTH_USERNAME and AUTH_PASSWORD are set. Ignored under Home Assistant ingress. |
AUTH_PASSWORD |
(unset) | Password for optional HTTP Basic Auth. Ignored under Home Assistant ingress. |
Security note: by default the web UI has no authentication, anyone who can reach the port can see device
localKeyvalues. Set bothAUTH_USERNAMEandAUTH_PASSWORDto require a login. This is recommended whenever the port is reachable beyond localhost. Basic Auth sends credentials unencrypted over plain HTTP, so still keep it on a trusted network or behind a TLS reverse proxy, and do not expose it directly to the internet. On Home Assistant, ingress already authenticates access, so these credentials are ignored for ingress requests. Set them only if you enable the direct port access and want a separate login there.
CLI
Set up the local environment:
./setup.sh
Run the CLI:
.venv/bin/python tuya_devices.py
Install the CLI command into the virtualenv:
.venv/bin/python -m pip install -e .
.venv/bin/tuya-local-key
First run prompts for your Smart Life user code, prints a QR code in the terminal, saves tuya-login-qr.png as a fallback, waits for confirmation, and then lists devices. The session is cached at ~/.config/tuya-smartlife/session.json.
| Flag | Description |
|---|---|
--user-code CODE |
Provide the Smart Life user code instead of being prompted. |
--json |
Output raw JSON. |
--csv PATH |
Also write results to a CSV file. |
--relogin |
Ignore the cached session and scan a new QR code. |
--logout |
Delete the cached session and exit. |
--session PATH |
Use a different session-cache file. |
--scheme {tuyaSmart,smartlife} |
QR scheme prefix. |
Finding Your User Code
In the Smart Life app, go to Me > Settings > Account and Security > User Code.
Scanning the QR Code
In the Smart Life app, tap + > Scan, point at the QR code, and tap Confirm login.
The app may ask you to confirm login for "Home Assistant". That is expected because this tool signs in through Home Assistant's Tuya app registration. Only confirm if you started the login.
The QR code expires within a minute or two. If it times out, start the login again.
Demo Screenshots
Login
QR Login
Device Table
Filtering
Troubleshooting
- Terminal QR will not scan: open the saved
tuya-login-qr.pnginstead. - Login timed out or QR expired: start the login again and scan promptly.
session_invalidor redirected back to login: the cached login expired; scan again.- No devices found: confirm the devices are paired in the Smart Life app under the same account.
Comments