
Agentic browser control, driven by the AI subscription you already pay for.
A Chrome side panel that reads and acts on the page you're actually looking at:
click, type, fill forms, move between tabs, all through your existing claude
or cursor-agent CLI instead of a metered API key.
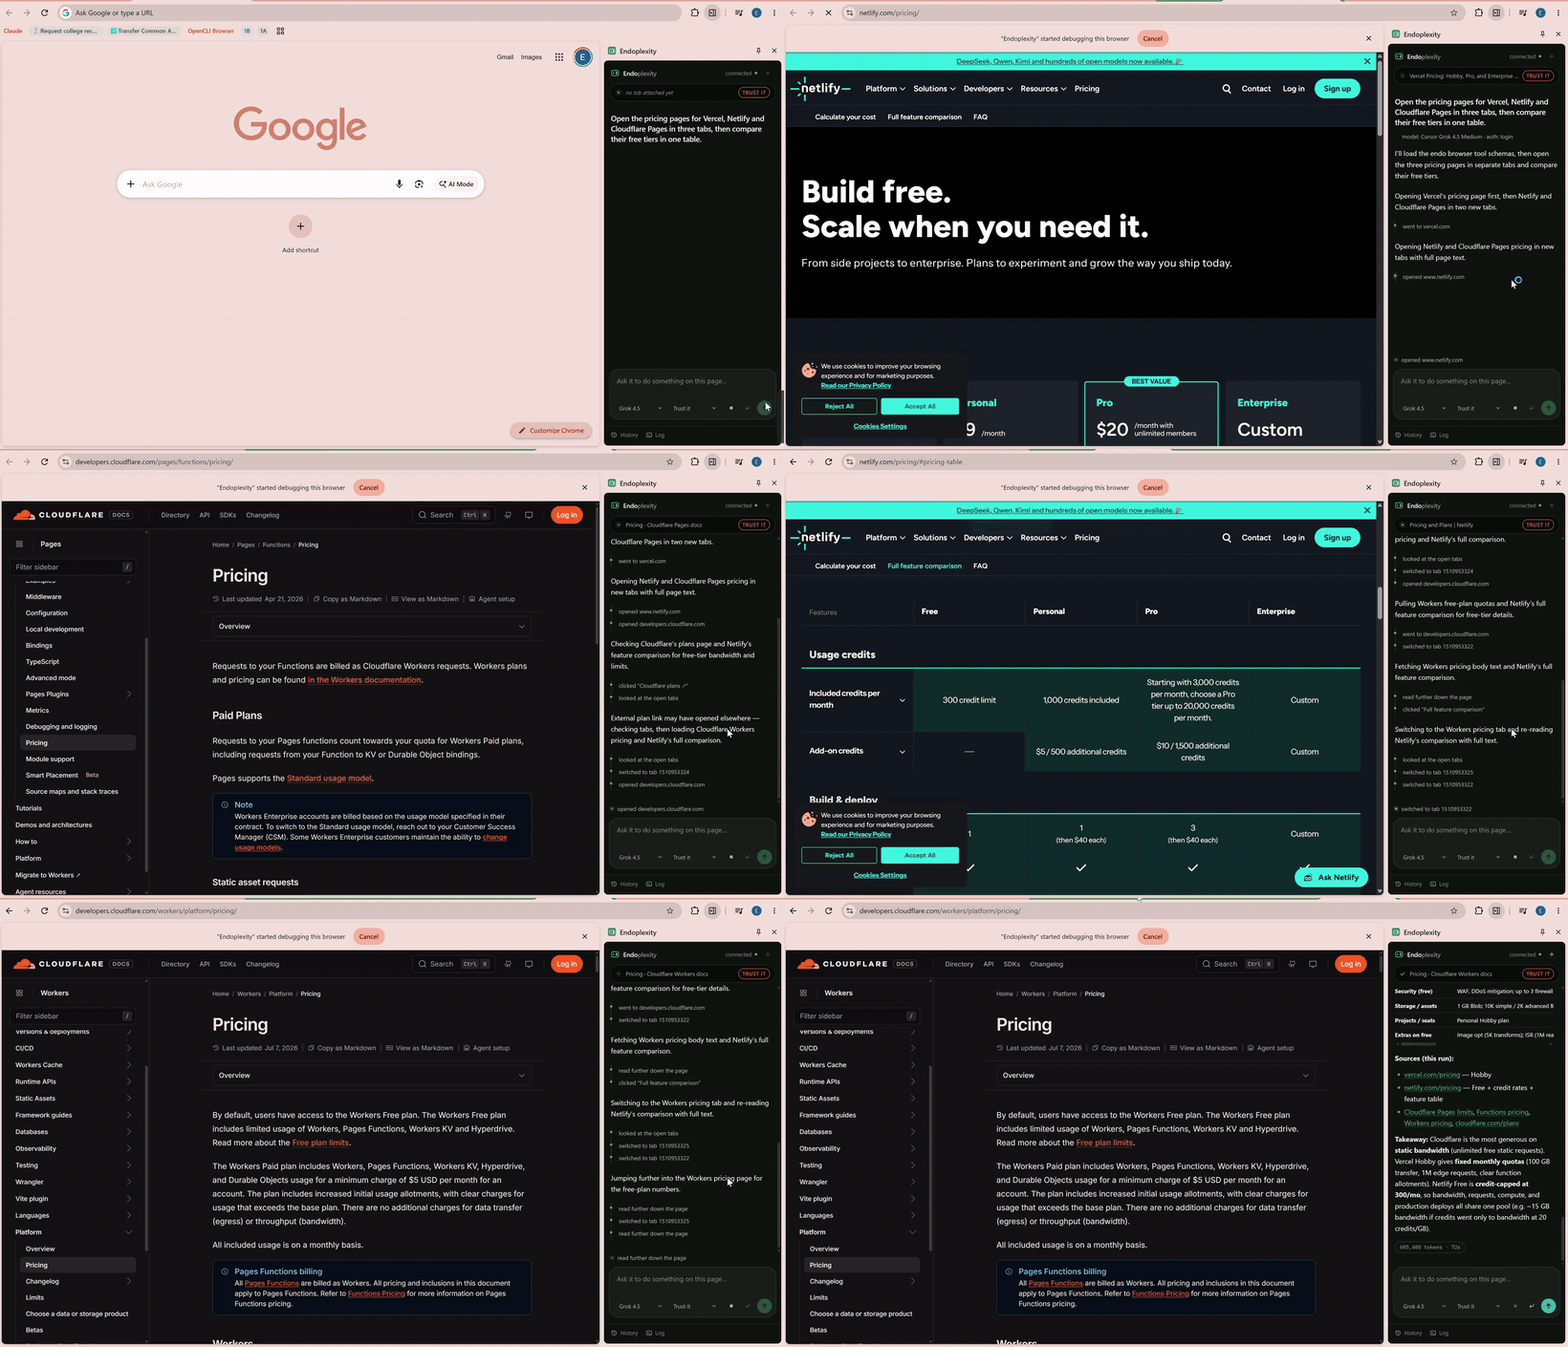
Real time, no cuts beyond a trim and a speed-up · full-quality video
What you just watched
One instruction: "Open the pricing pages for Vercel, Netlify and Cloudflare Pages in three tabs, then compare their free tiers in one table."
It opened three tabs, read each pricing page, followed a plan link that actually lived on a different page, noticed when a link took it somewhere unexpected and recovered from it, then came back with a comparison table, the sources it used, and a takeaway naming the trade-off between Cloudflare's unlimited static bandwidth and Netlify's credit cap.
That banner reading "Endoplexity started debugging this browser" is Chrome's own, and it stays up the whole time. This is your real browser, your real session, on the pages you already had open. Not a headless copy that has to log back in to everything.
Why this exists
Most open-source "browser agent" projects need an API key and bill you per click. But if you already pay for Claude or Cursor, a tool-calling agent loop is sitting on your machine right now, fully paid for, doing nothing.
The brain didn't need building. What was missing was hands (a browser it can actually touch) and a face (a panel that shows its work). That's the whole project: a tool server and a UI. The agent loop is the CLI you already have installed.
How it works
The extension never talks to a model directly. The CLI never talks to Chrome. Neither one holds the other's credentials.
┌──────────────────────┐   WebSocket    ┌──────────────┐    MCP/HTTP   ┌──────────────────┐
│  Chrome side panel   │  origin-pinned │ local bridge │  token-gated  │  claude -p       │
│  (MV3)               │◄──────────────►│  127.0.0.1   │◄─────────────►│  cursor-agent -p │
│  owns chrome.debugger│                │  :8787       │               │  (the agent loop)│
└──────────────────────┘                └──────────────┘               └──────────────────┘
The panel owns the CDP connection itself rather than handing it to the service worker, which sidesteps MV3's idle teardown. The bridge exposes 14 browser tools over MCP, and it's where the safety policy actually lives. Never in a prompt, so nothing the model says can widen its own permissions.
Tools: snapshot navigate click type key upload read_file
select scroll hover back forward tabs use_tab
Two decisions do most of the work here:
- Pages go to the model as an accessibility-tree snapshot, not raw HTML. It's what the model actually needs, at a fraction of the bytes.
- Actions return the page they produced, so acting and re-reading happen in one turn instead of two. After the first read, only the lines that changed get sent again.
read_file reads an attached document as text (PDF, DOCX, XLSX, PPTX, CSV,
JSON, Markdown, or any text file), so the agent can answer questions about an
attachment instead of only pushing it into a form field. You attach one by
dropping it on the composer — see Files.
Getting started
This takes about five minutes. No API key, no billing page, no dashboard to configure. Just Node, Chrome, and a CLI you probably already have logged in.
1. Check what you need first
- Node 24 or newer. The bridge runs TypeScript directly, no build step,
and that only works on 24+. Check with
node -v. - Chrome 114 or newer. 135+ gets themed dropdowns; anything older just falls back to the native picker, nothing breaks.
- The
claudeCLI, thecursor-agentCLI, or both, already logged in to a real subscription. A Claude Pro plan is enough (you don't need Max); pick Sonnet in the model dropdown once you're running, since reading a page and clicking things doesn't need a frontier reasoning model.
2. Clone it and install
git clone https://github.com/Endokelp/Endoplexity.git
cd Endoplexity
npm install
3. Start the bridge
npm run setup
This writes a small launcher into your Windows Startup folder, so the bridge
comes up automatically every time you log in. No console window stays open,
no token to copy anywhere. If you'd rather run it by hand instead (or you're
not on Windows), npm start runs it in the foreground so you can watch its
log directly. If something ever seems stuck, .endo-bridge.log at the repo
root is the first place to look.
4. Load the extension into Chrome
- Open
chrome://extensions - Turn on Developer mode (top right)
- Click Load unpacked
- Select the
extension/folder from this repo
You'll see the Endoplexity icon appear in your toolbar.
5. (Optional) Log in to Cursor too
Only needed if you want to run tasks through Cursor's models as well as Claude's:
npm run cursor-login
This is a one-time login into a bridge-owned Cursor profile, kept separate
from your normal cursor-agent login so the two never collide.
6. Files
Drag a file onto the composer, paste one, or use the paperclip. It shows up as
a chip, and from then on the agent can read it (read_file) or put it into a
form field (upload). Any file type — anything it can't turn into text, it
says so rather than guessing.
The bridge keeps its own copy and hands the model a key (resume), never a
path. Attachments survive restarts, and the × on a chip deletes the copy.
If you'd rather point at a file where it already lives, .endo-files.json still
works and behaves identically:
cp .endo-files.example.json .endo-files.json
{
  "resume": "C:\\Users\\you\\Documents\\resume.pdf"
}
Both files are gitignored, and so is the attachment directory — everything stays on your machine.
7. Run your first task
Click the Endoplexity icon to open the side panel, type what you want, and hit Run. A couple of things worth knowing right away:
Enterstarts a fresh task.Ctrl/Cmd+Enterreplies inside the current conversation instead of starting over.- Type
@in the box to hand the agent another tab you have open. - A fresh Run always attaches to whichever tab you're currently looking at, so open the page you want it working on before you press Run.
Try something low-stakes first, like summarizing whatever page you're on before you point it at a form. For a deeper look at what each part of the panel shows and how the approval gate behaves, see docs/handrun.md.
The safety model
This drives a browser that's logged into your real accounts, so the boundaries here are worth stating plainly, including where they stop.
- Loopback only. The bridge binds
127.0.0.1, never0.0.0.0. - The panel is identified by origin, not a shared secret. The extension
ID is pinned by an RSA
keyin the manifest, and the WebSocket upgrade has to match that exact origin. Page script can't forge anOriginheader. The/mcpendpoint, which a CLI reaches with no origin at all, is gated instead by a token in a0600gitignored file, never passed on a command line. - The agent gets browser tools and nothing else. Claude runs with an
explicit allowlist plus
--strict-mcp-config --setting-sources ""; Cursor runs in an isolated profile withShell,Write,Read, andWebFetchall denied. Both were verified by actually trying to run a shell command, not by reading the documentation and hoping. - Irreversible actions stop for a human. Submitting, deleting, and
purchasing all hit an approval gate that lives in the bridge. Silence
denies. A disconnected panel denies.
Know exactly what that check is: it matches the clicked element's
visible label against a list of English words (
submit,pay,delete,confirm, and a few more). It's a label heuristic, not real understanding of the page. A button labelled in another language, worded unusually ("Finish", "Yes, place it"), or carrying only an icon will not be caught. Usewatchmode where that matters. - Three autonomy modes (
watch/normal/trust), chosen in the panel and enforced in the bridge. An absent or unrecognised mode falls back tonormal, nevertrust, so it fails closed.trustdisables the gate entirely, which is why the panel shows it in red the whole time it's set. (The demo above runs intrustmode, which is why you never see the gate fire.) - Files resolve a configured key, never a model-supplied path.
DOM.setFileInputFilesruns in the browser process and can read almost anything, so a model-chosen path would be an exfiltration primitive. Note the asymmetry:uploadhands a file to a page without the model ever seeing its contents, butread_fileputs those contents directly in the model's context. That allow-list is the whole boundary, so only put in it what you actually mean to share.
Found a hole? See SECURITY.md and please report it privately.
What it costs
A complete job application, filled agent-driven on a real Greenhouse form:
| Cost | $0.0959 |
| Tokens | 112,064 |
| Turns | 10 |
| Wall clock | 42s |
That dollar figure is what the CLI reports as equivalent API spend. On a subscription, it's already covered by what you're paying monthly, which is the entire point of this project.
The same task measured flat against a 5-tool baseline, even while carrying about 18k tokens more of tool schema, so going from 5 tools to 13 cost nothing per run in practice. Page returns were later cut 3.8x by sending a full page once and then only the lines that changed afterward: 119,856 → 31,626 tokens on a ten-turn Hacker News task.
Status
Early. v0.0.1, and honest about it. The tool layer, approval gate, session
continuity, and panel are all built and tested: 156 unit tests, plus an
in-panel self-test that drives the real CDP layer against a cross-origin
fixture (run await endo.selftest() in the panel's own console).
Known gaps, stated rather than hidden:
- Windows-first.
npm run setupinstalls autostart via a Startup-folder script. macOS and Linux autostart aren't implemented yet, though the bridge itself is portable andnpm startworks anywhere. - Sessions live in the bridge's memory. Restarting it ends resumability on purpose: resuming into a Chrome that's moved on would hand the agent a transcript full of stale element references.
- Real ATS comboboxes usually aren't
<select>elements, so they need a click-then-click flow rather than theselecttool. chrome://pages and the Web Store can't be driven, since Chrome refuses the debugger there.- After a lot of navigation, dead out-of-process iframe sessions can leave a stray line of noise in a snapshot.
Development
npm test     # 156 tests, node:test, no framework, no build step
npm start    # run the bridge in the foreground to watch its log
There's no bundler and no framework here. The extension is plain HTML and JS, and the bridge is TypeScript run directly by Node 24.
docs/handrun.md is the manual verification checklist.
Comments