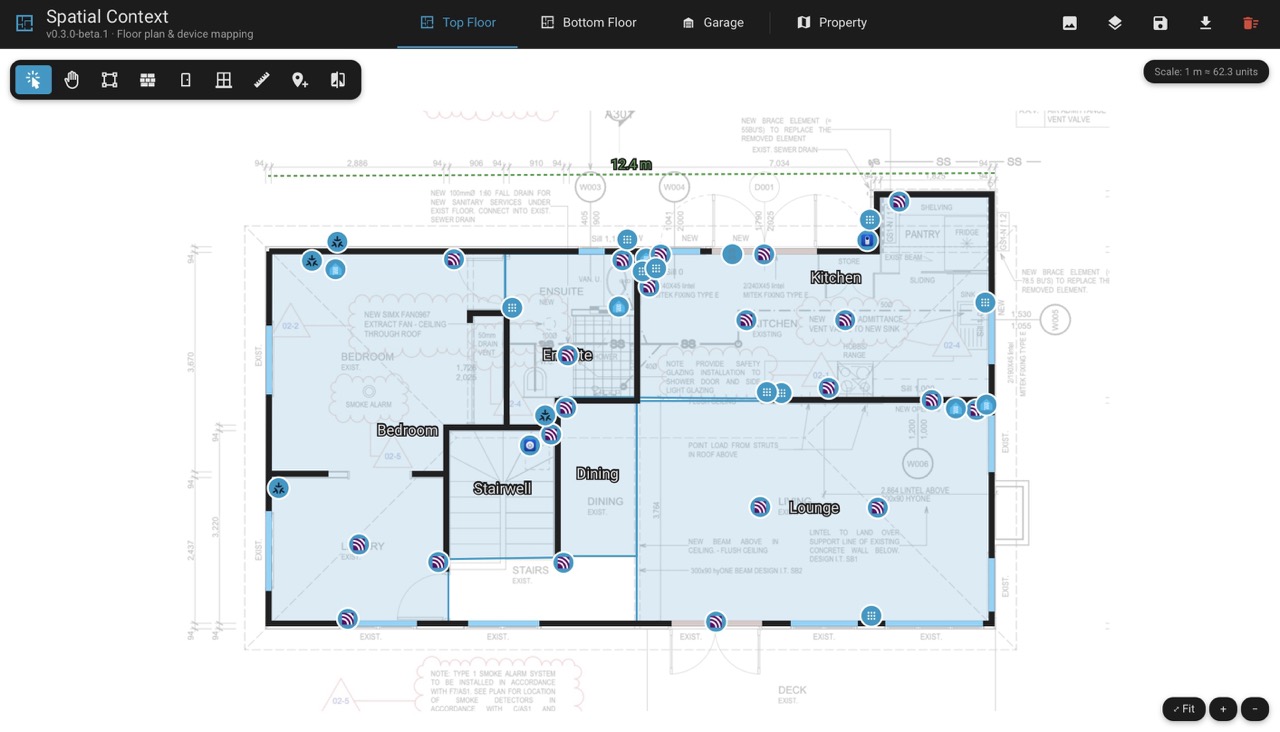
A Home Assistant custom integration for tracing your home's floor plans and placing your real devices on them — so an AI assistant (or anything else) can be given real physical/spatial grounding for your home, not just entity names.
What it does
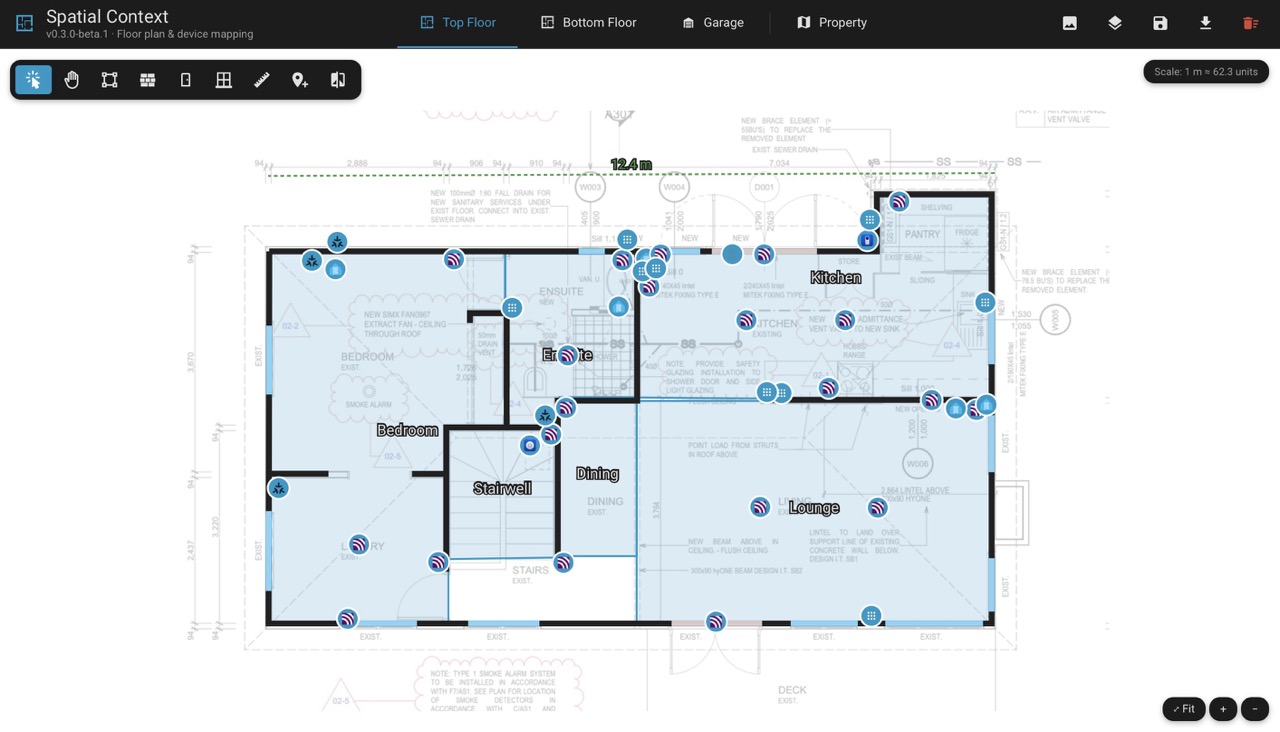
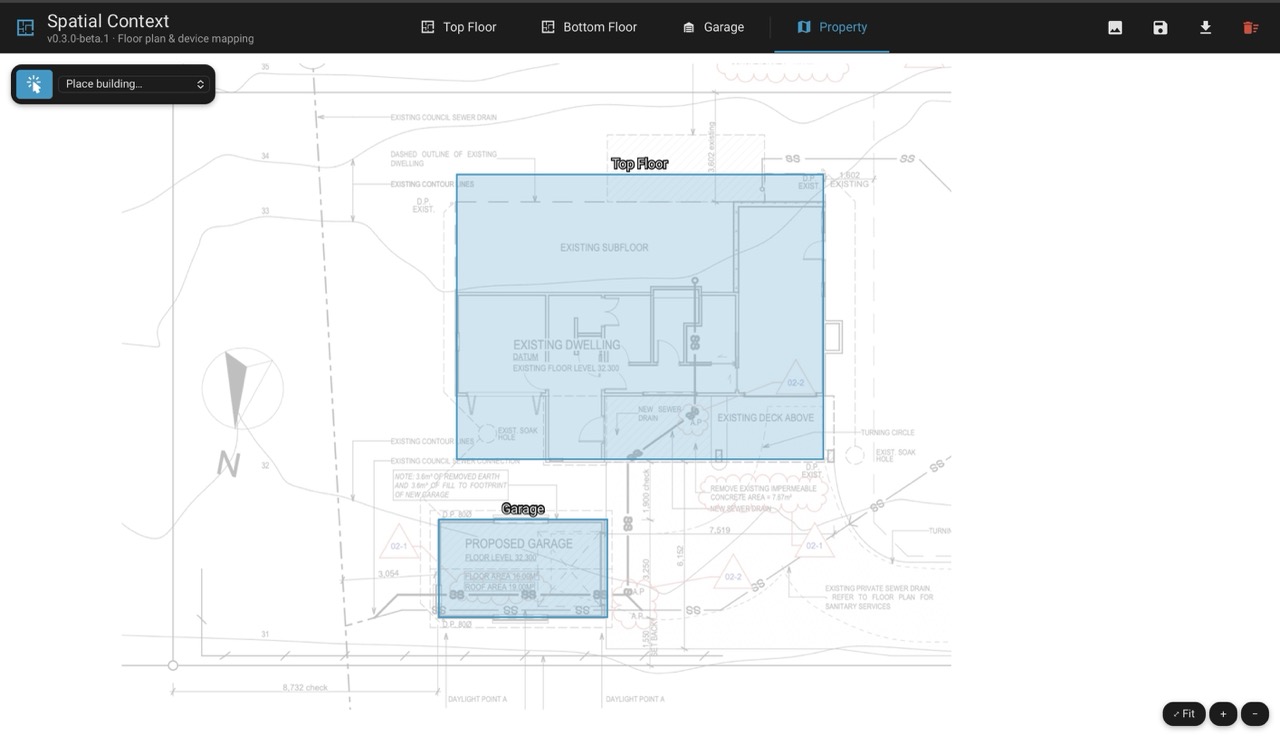
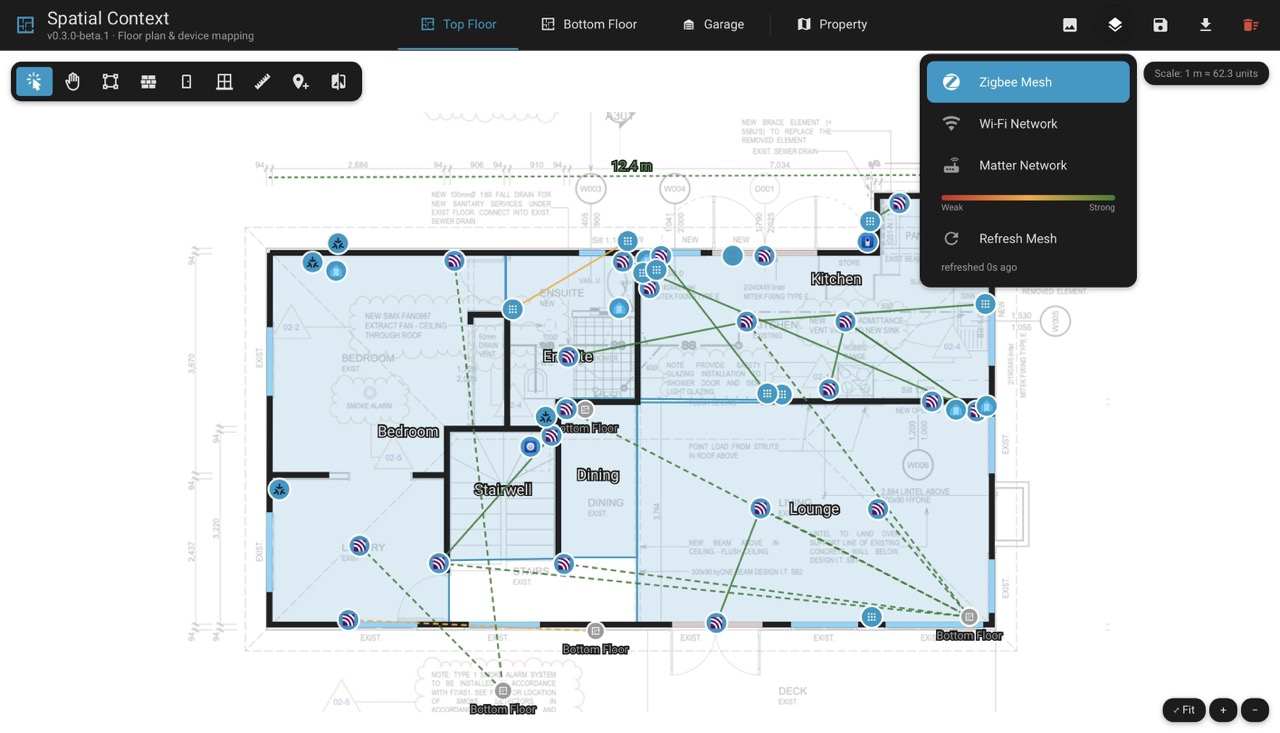
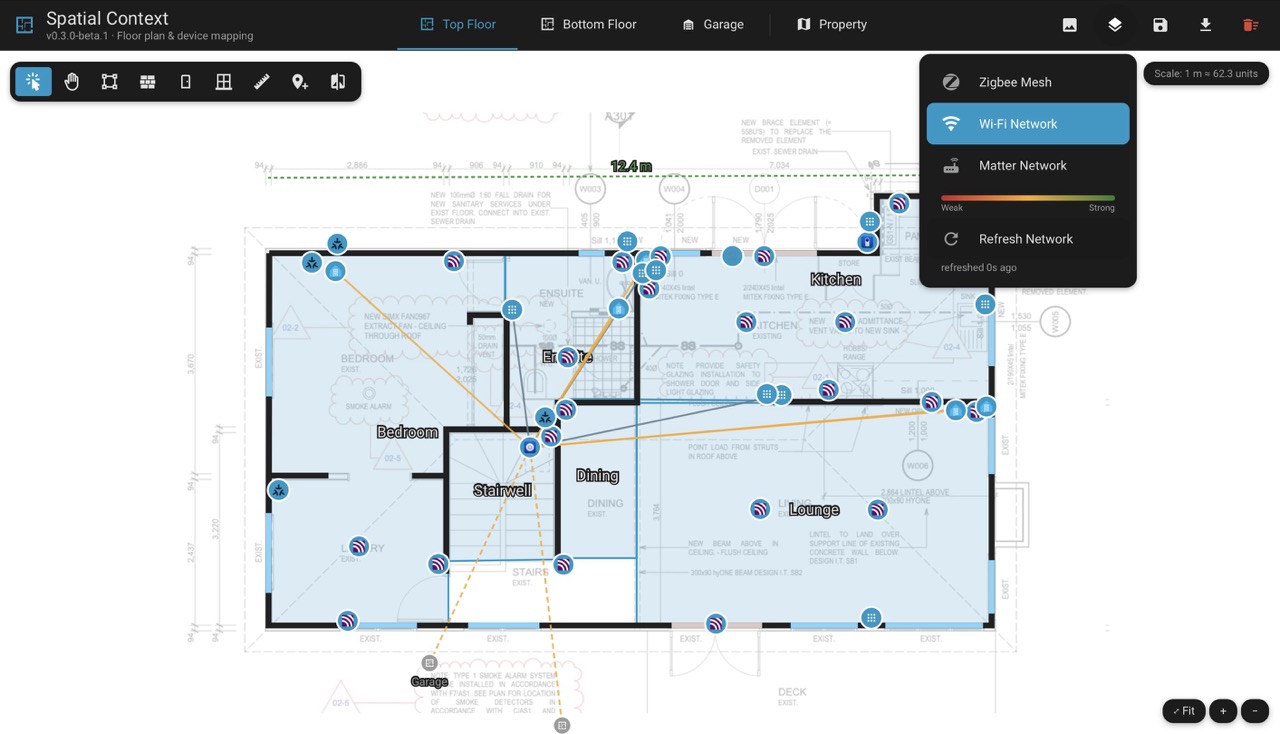
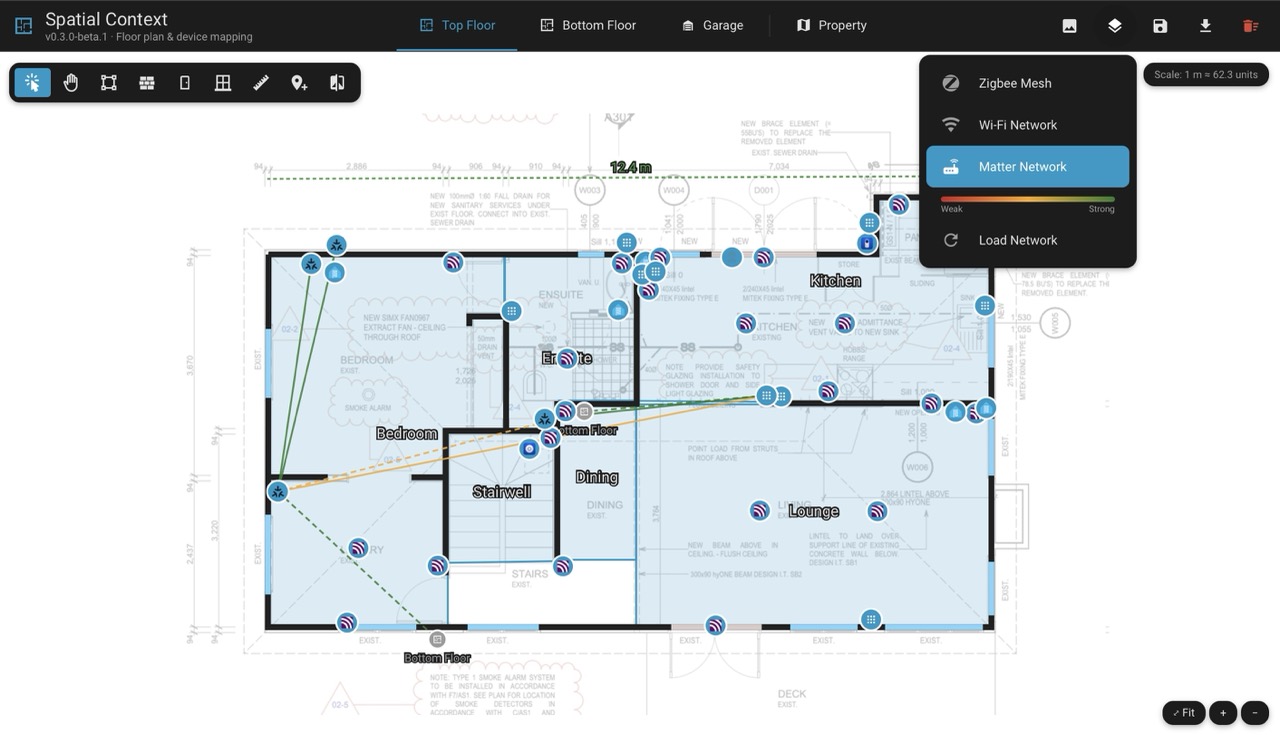
Adds a Spatial Context panel to the HA sidebar, one tab per floor — read live from HA's own floor registry (Settings → Areas → Floors), no separate floor concept to maintain. Trace each floor's rooms and walls (tagged with a material and real thickness for RF-attenuation reasoning) over a background image, calibrate it to real-world metres, then place your actual devices on it and overlay live Zigbee/Wi-Fi/Matter mesh topology directly on the map. A separate Property tab lets you place each building (a multi-story house aligned into one, a detached garage, etc.) on a whole-property site photo, to see how everything relates at a glance. Your chosen pan/zoom on each tab is remembered across visits once saved.
Installation
Beta (see Status below) — not yet submitted to the HACS default repository, so it needs to be added as a custom repository first.
Option 1: HACS, one click

Option 2: HACS, manually
- In HACS: ⋮ (top-right) → Custom repositories.
- Paste this repository's full URL into Repository:
https://github.com/Greminn/ha-spatial-context - Set Type to Integration, then Add.
- Find Spatial Context in HACS and install it.
Either way, this is a beta release (tagged as a pre-release), so enable Show beta versions for this repository — or globally in HACS's own settings — if you don't see it.
Option 3: manual copy, no HACS
Copy custom_components/spatial_context/ from this repository into your Home Assistant's /config/custom_components/ directory.
After installing
Settings → Devices & Services → Add Integration → Spatial Context, and it'll appear in your sidebar.
Getting started
- Set up floors in HA, if you haven't already — Settings → Areas → Floors. Spatial Context has no floor concept of its own; its tabs come straight from there.
- Open Spatial Context from the sidebar and pick a floor tab.
- Add a background image — Background icon, top-right. Starting from a PDF? See Getting a background image.
- Set the scale — Set Scale, click two points a known distance apart. Do this before anything else; it's what puts every later measurement in real metres.
- Trace rooms and walls — Trace Room / Trace Wall. Assign each room a real HA area, each wall a material and thickness.
- Place your devices — Place Device, pick from the list, click the map. A device can only be placed once, on one floor.
- Repeat steps 3–6 for every floor.
- Align floors that physically stack (upstairs directly over downstairs) — Align Floors. This puts them in one coordinate system, which cross-floor Connectivity Map links need and is what lets them collapse into one building next. Leave a standalone floor (a detached garage) unaligned.
- Place buildings on the Property tab — switch to Property, upload a site photo, then Place Building for each one. Aligned floors place as a single building; unaligned ones place separately.
- Save often — Save, in the header, on whichever tab you're editing.
From here: Connectivity Map shows live Zigbee/Wi-Fi/Matter links over your devices, and Export downloads the whole layout as JSON.
Getting a background image
Spatial Context traces over a background image per floor (via HA's built-in image upload, PNG/JPEG/GIF). If you're starting from an architect's PDF floor plan, rasterize it first, e.g.:
pdftoppm -png -r 150 your-floor-plan.pdf your-floor-plan
Toolbar (top-left, over the canvas)
One tool is active at a time; clicking the active tool again returns to Select. Everything below is a mode you switch into, use, then switch out of — nothing here is destructive by itself (deleting something always asks first).
| Icon | Tool | What it does | How to use it |
|---|---|---|---|
 |
Select | The default mode — click anything to select it and edit it (rename, change area/material, edit vertices, delete) via the panel that appears bottom-left. | Click a room, wall, door/window, or device pin. Drag a selected shape's vertex handles to reshape it, or drag a pin to move it. Dragging empty canvas pans the view. |
 |
Pan | Move around the floor plan without any risk of accidentally selecting or dragging something — every drag pans, even over walls/pins. | Click the tool, then drag anywhere. Mouse wheel/trackpad scroll also pans in any mode; the + / − buttons (bottom-right) zoom. |
 |
Trace Room | Draw a room's outline as a polygon. | Click each corner in order; click back near your starting point to close the loop. Select the finished room to assign it to a real HA area and rename it. |
 |
Trace Wall | Draw a wall as a line (open or closed), tagged with a material and real thickness for RF-attenuation reasoning. | Click each point along the wall; click Finish Wall in the hint bar to end it as an open run, or click back near the start to close it into a loop. Select the finished wall to set its material (timber-framed, brick veneer, concrete/block, aerated/foam concrete block, ceramic/Poroton block, glass, steel frame) and its thickness — a dropdown next to the thickness field lets you enter it in cm or m (in/ft under Imperial, see Settings) — attenuation is that material's per-cm rate × the wall's actual thickness, and once the floor is calibrated the drawn line width scales to match. |
 |
Add Door | Place a door along an existing wall. | Click on a traced wall at the point where the door sits. Select it to edit its width the same way a wall's thickness is edited (number + cm/m or in/ft picker); it renders at its own wall's real thickness, not a fixed size. |
 |
Add Window | Place a window along an existing wall. | Same as Add Door — click on a traced wall at the point where the window sits. |
 |
Set Scale | Calibrate the floor's real-world scale, so every other measurement (device spacing, exports) is in real units instead of arbitrary drawing units. | Click two points a known real-world distance apart (e.g. two ends of a wall you've measured), then enter that distance (metres, or feet under Imperial) when prompted. Re-run any time to recalibrate. |
 |
Place Device | Drop a pin for one of your real, live HA devices. | Opens the device picker on the right — search or filter by floor/area, click a device to arm it, then click on the map to place its pin (click an existing pin to stack a co-located device on top of it instead). A device already placed on a different floor is greyed out and can't be placed again here. |
 |
Align Floors | Line up two floors that physically stack (e.g. an upstairs and downstairs) into one shared coordinate system. | Pick another floor from the dropdown that appears — its background image overlays yours, semi-transparent. Drag to reposition it and use the + / − buttons to rescale, then Apply to rigidly transform every room/wall/pin/door/window on that floor to match (and copy this floor's scale calibration onto it). Cancel discards the adjustment. Floors that aren't physically stacked (a detached garage, say) should just stay unaligned. |
Header (top-right)
| Icon | Name | What it does |
|---|---|---|
 |
Background | Upload, replace, or remove the current floor's background image, and adjust its opacity. |
 |
Connectivity Map | Toggle a live mesh overlay — Zigbee, Wi-Fi, or Matter/Thread — drawn between your placed devices, quality-graded (LQI/RSSI where available). Off by default; picking a layer and hitting Load/Refresh/Connect fetches it. Click any line for details on what it connects and its link quality. A link to a device on a different floor draws as a dashed line toward that floor (its real direction, using your Property tab placements) instead of just disappearing — click its marker to jump straight there. Closing this menu turns the overlay back off. |
 |
Save | Save the current floor's (or Property tab's) layout, including whatever pan/zoom you're currently looking at — that view is restored next time you open this floor/tab. A dot badge shows when there are unsaved changes. |
 |
Settings | App-wide preferences, shared by everyone who opens the panel (not per-browser). Currently just one: Metric (m / cm) or Imperial (ft / in) — governs the default unit shown in every real-world measurement (scale calibration, wall thickness, opening width, device height). Applies instantly, no Save needed. |
 |
More options | Export — download a denormalized JSON snapshot (floors → rooms → devices, in real units once calibrated) for use outside Home Assistant. Reset floor / Reset property — clear the current floor's rooms/walls/devices/background (or, on the Property tab, every building placement and the site photo) entirely, to start over. Asks for confirmation first, and only takes effect once you also hit Save. |
Floor tabs & the Property tab
The tab bar shows one tab per HA floor (with that floor's own icon, or a generic floor icon if it hasn't been given one), plus a fixed Property tab ( ) at the end.
The Property tab is a separate, whole-property view — upload a site/aerial photo (same Background menu as a floor), then place a labeled, rotatable rectangle for each building: two floors linked via Align Floors collapse to a single placement (so a multi-story house shows as one shape), while a floor that's never been aligned to anything (a detached garage, say) gets its own.
- Place Building: pick a building from the dropdown in the top-left toolbar, then click the site photo to drop it there.
- Select a placement to drag it into position, drag a corner to resize it (the opposite corner stays fixed, and the shape is locked to that building's real proportions — computed from its traced rooms/walls, so it can't be squashed into an unrealistic shape), or drag the handle above it to rotate it to match the photo's orientation.
- The selection panel also offers Rename (a label override), Delete, and Go to floor — jumps straight to that building's own floor tab.
Screenshots
| Property tab | Zigbee mesh |
|---|---|
 |
 |
| Wi-Fi mesh | Matter mesh |
|---|---|
 |
 |
Development (frontend)
The panel is built from frontend/ (Lit + TypeScript) into a single bundle at custom_components/spatial_context/www/spatial-context-panel.js, which is committed — HACS and a manual copy both install this repo as-is with no build step, so that file has to already be there and up to date with the source.
To change the frontend:
cd frontend
npm install
npm run build
Then get that one built file onto your HA instance, however you can reach its config directory — copy it over Samba, use the File editor/Studio Code Server add-on, scp/rsync if you have SSH, or whatever else applies to your setup. A hard browser refresh picks it up immediately (no HA restart needed, since it's served from its own static path, not a versioned Lovelace resource).
If you do have SSH access to your HA host, frontend/scripts/dev/push.mjs (via npm run push / npm run dev) automates that last step — rsyncs the bundle over on every build, optionally watching for changes. It's purely a convenience for that one setup, not a requirement; copy frontend/.env.example to frontend/.env and fill in HA_HOST/HA_DEV_PATH to use it.
Status
Beta — work in progress. Actively developed, used daily on the author's own multi-floor home — but the interface and storage format may still change between releases, and it hasn't yet been tested against the wide variety of Home Assistant setups a stable release should handle.
Found a bug, or have an idea for something it should do? Please open an issue — both problems and feature ideas are genuinely welcome, not just polished bug reports.
Comments