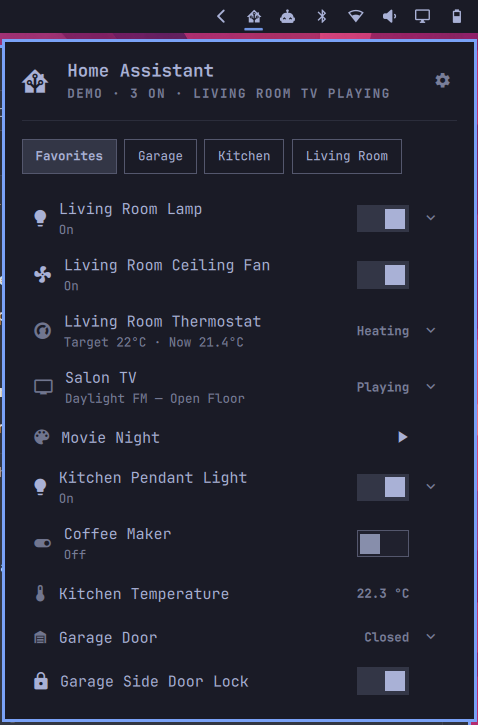
View and control your Home Assistant devices from the Omarchy bar.
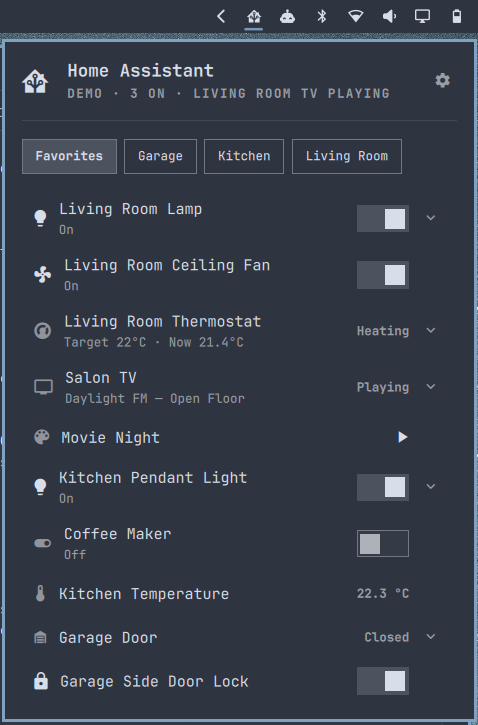
Quickshell plugin for Omarchy 4. Pick the devices and toggle lights, adjust climate, drive media, and open covers.
Not affiliated with or endorsed by the Home Assistant project.
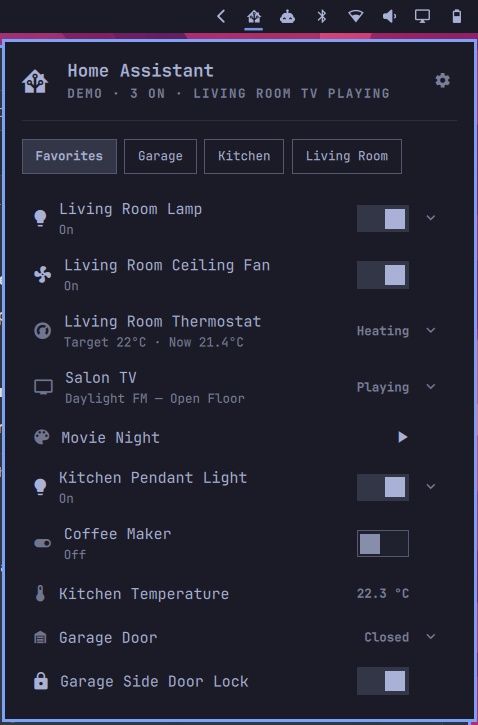
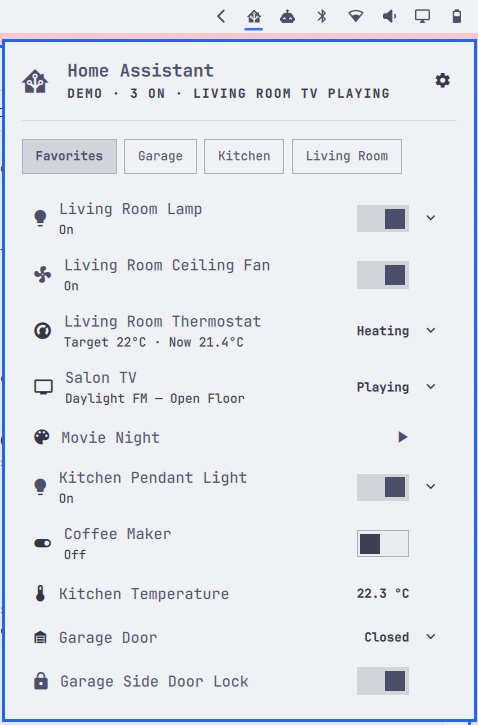
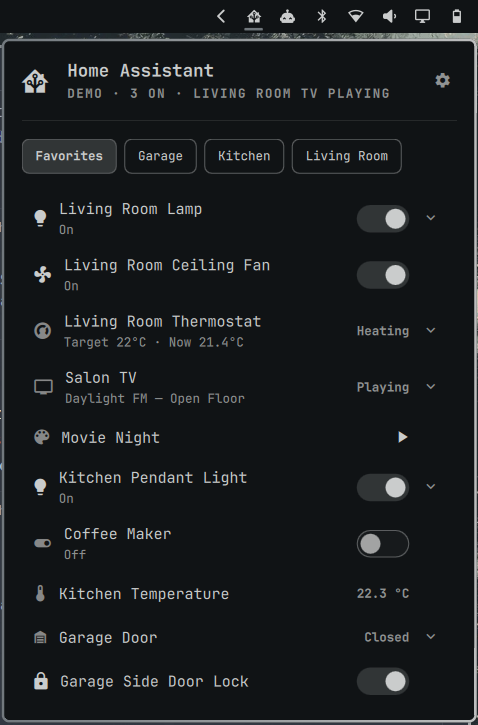
Screenshots
| Tokyo Night | Catppuccin Latte |
|---|---|
 |
 |
| Solitude | Nord |
 |
 |
Keyboard
With the panel open, j/k or ↑/↓ traverse device rows and their
expanded controls. Inside expanded controls, ←/→ move between selectors;
otherwise they switch area tabs. enter activates the selected row or opens
the selected dropdown. e expands its controls, s opens settings, r
refreshes, esc closes, and tab moves to the next bar panel.
What you can control
| Domain | Control |
|---|---|
light |
On/off, plus a brightness slider when the light is dimmable, colour swatches with hue and saturation when it renders colour, and a warmth slider when it does colour temperature |
switch, fan, input_boolean, humidifier |
On/off |
lock |
Lock/unlock switch |
scene, script |
Activate button |
media_player |
Previous / play-pause / next, volume slider |
cover |
Open / stop / close |
climate |
On/off when advertised, plus HVAC, fan, preset, swing, and target-temperature or low/high-band controls when advertised |
sensor, binary_sensor, everything else |
State display only |
Cameras not yet.
Scripting
The panel is reachable over the shell's IPC, so a device can go on a keybind:
omarchy-shell hass toggleEntity light.desk
omarchy-shell hass activate scene.movie_night
omarchy-shell hass expand climate.hallway   # opens the panel, unfolded
omarchy-shell hass favorite light.desk      # add to / remove from the panel
omarchy-shell hass status
omarchy-shell hass settings             # connection settings
omarchy-shell hass devices              # device picker
Requirements
- Omarchy 4 (
schemaVersion: 1plugin API) - Python 3.11 or newer
secret-tool(libsecret) with a running keyring daemonnmcli(NetworkManager), only if you use a local network URL
The pure-Python runtime of websockets 17.0.1 is bundled with the plugin and
loaded from vendor/. Users don't need python-websockets, qt6-websockets,
pip, a virtual environment, or a first-run download.
Install
omarchy plugin add https://github.com/konradk/hass.git --enable
For local development, symlink the checkout instead:
ln -sfn "$PWD" ~/.config/omarchy/plugins/hass
omarchy restart shell
omarchy plugin enable hass
Setup
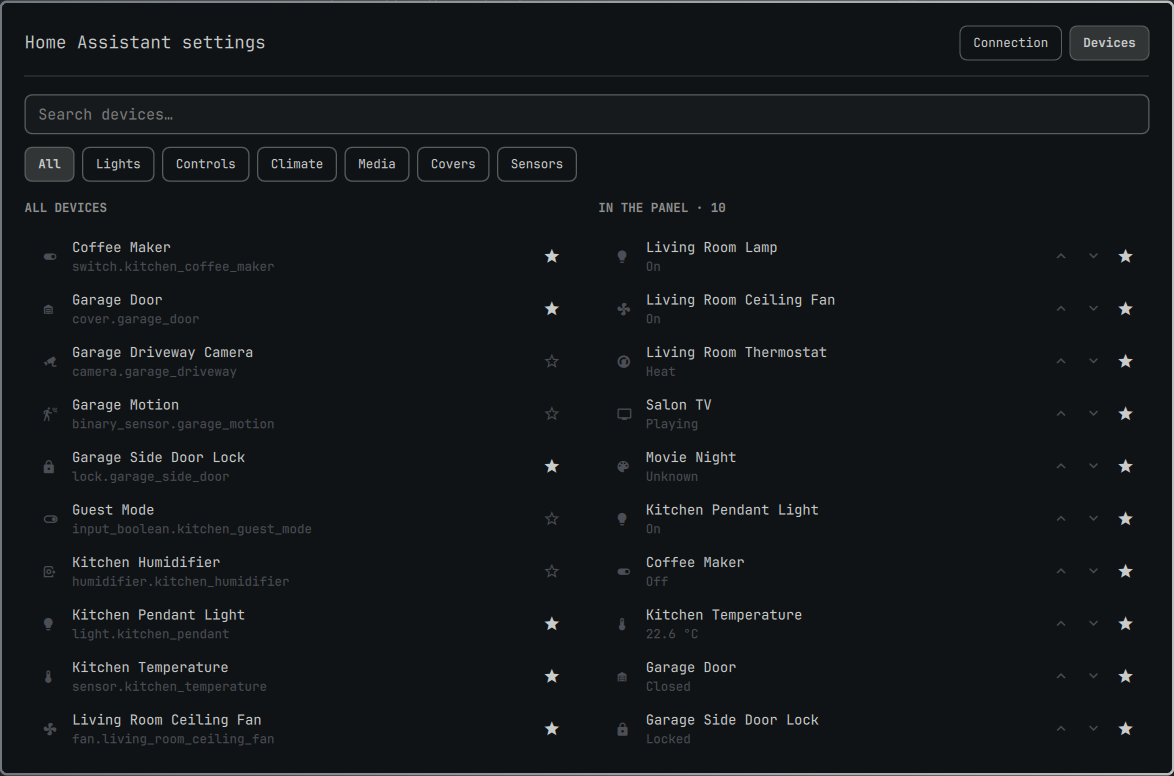
Click the gear in the panel header, or press s with the panel open. From a
terminal: omarchy-shell hass settings, or omarchy-shell hass devices
to open device picker.
Paste your Home Assistant URL and a long-lived access token (Home Assistant → your profile → Security), or flip on Demo mode to try the panel against a built-in fake house with no instance at all. Then switch to Devices and star the ones you want in the panel.
Optionally, turn on Local network URL to add your instance's LAN address. It's the same Home Assistant instance reached by a different address, so it reuses the one access token above rather than needing its own. It also asks for the name of your trusted Wi-Fi network (comma-separate more than one, for example if your router has separate 2.4GHz/5GHz names): the local URL is only ever tried while connected to one of those, and the URL above is used everywhere else. If that field is empty, it'll offer the network you're currently on as a one-click suggestion. This matters because the local URL is plaintext-friendly on the assumption that your home network is trustworthy — without the network-name check, a laptop that later joins some other Wi-Fi with something answering on that same address would send it your token.
Debugging
omarchy-shell hass status     # what the widget sees
omarchy-shell hass toggle     # open/close the panel
omarchy plugin validate .     # check the manifest before committing
Tests
python3 tests/test_bridge.py     # bridge, against a fake Home Assistant
python3 tests/test_vendor.py     # pinned dependency, license and offline import
python3 tests/test_service_contract.py
node    tests/test_connection.js # URL/origin and generation rules
node    tests/test_config.js     # config normalization and secret exclusion
node    tests/test_store.js      # state and registry projections
node    tests/test_model.js      # entity formatting and classification
node    tests/test_row_model.js  # ListModel row projection
python3 tests/test_qml_style.py  # UI house style (fonts, palette, tokens)
Security
Your long-lived access token is stored in the system keyring via secret-tool.
Use an https:// Home Assistant URL whenever possible. If you explicitly use
http://, the token is sent without transport encryption; reserve that for a
trusted local network where you understand the risk.
When the checkout is symlinked for local development, runtime settings are
written to config.json in the checkout. That file is ignored because it can
contain private instance URLs, area names, entity IDs, and display-name
overrides. The access token is never stored there.
Bundled dependency maintenance
websockets 17.0.1 is redistributed under BSD-3-Clause; provenance, the sdist
SHA-256 and omitted files are recorded in vendor/README.md,
with legal notices in THIRD_PARTY_NOTICES.md.
Comments