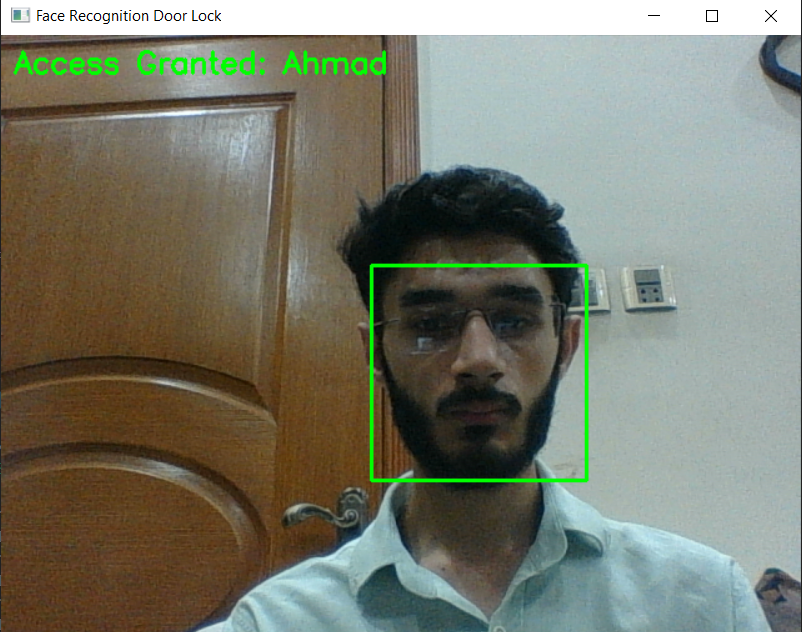
A low-cost, open-source door lock system powered by Python + OpenCV +
face_recognition. Show your face to a camera, if it matches a saved
face, the door unlocks. Otherwise, access denied.
Works with any webcam (or phone camera). Hardware for the actual lock is optional and swappable, you can run it in pure simulation mode on your laptop with zero extra hardware, or connect it to a Raspberry Pi, Arduino, or an MQTT/IoT setup.
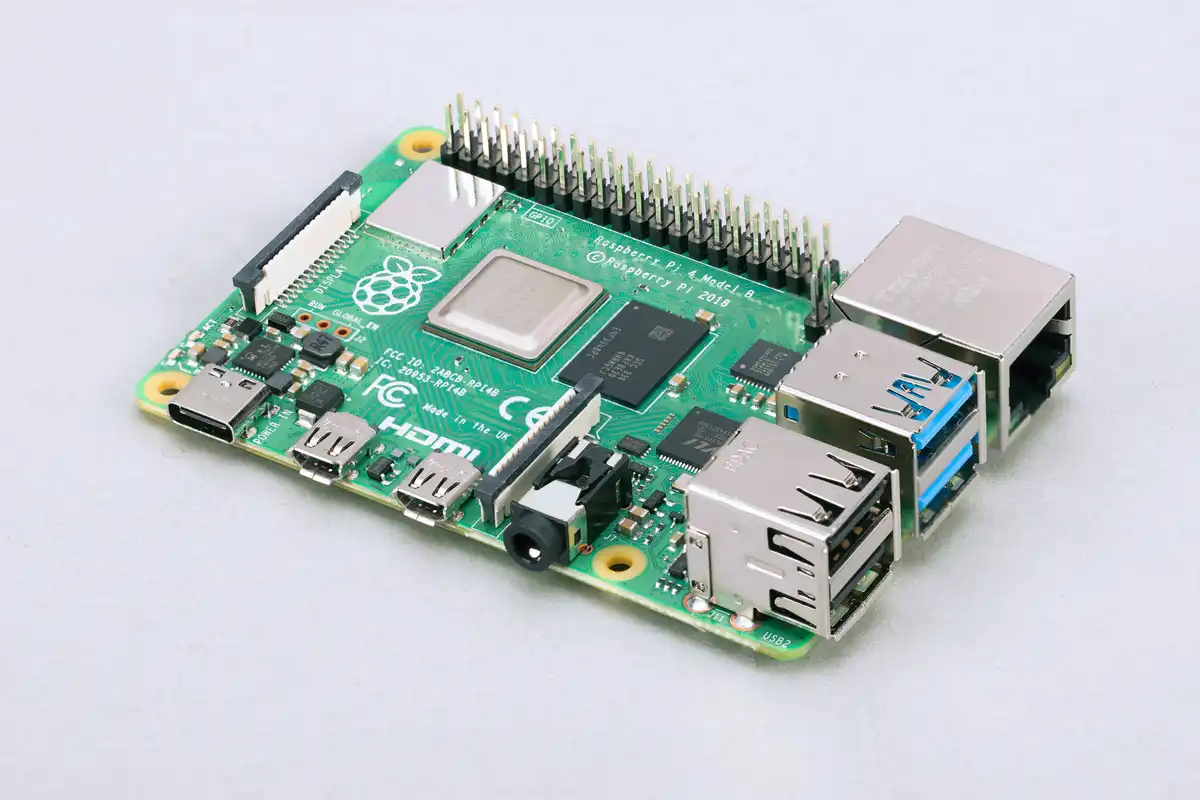
Raspberry Pi 4 Model B, the recommended board for real hardware deployment. Image courtesy of Raspberry Pi Ltd.
🎥 Demo
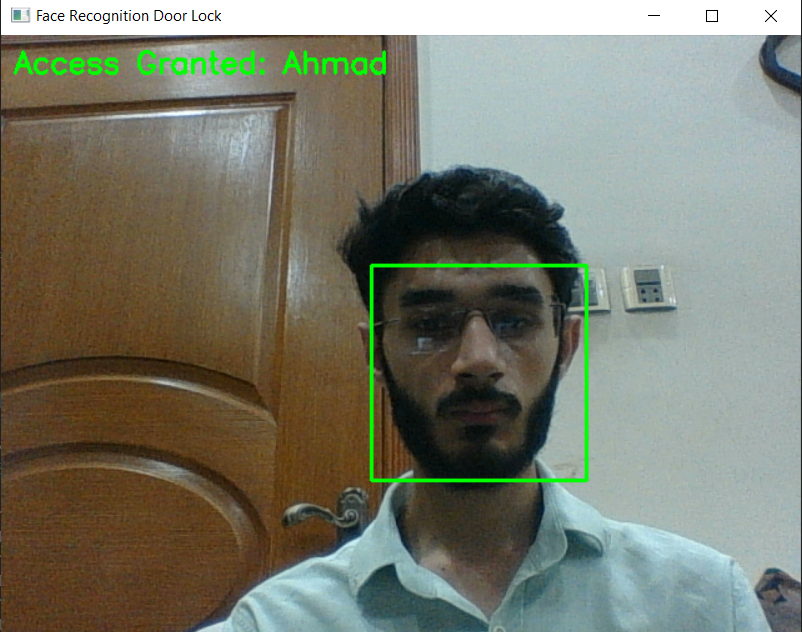
Real-time detection: a registered face is matched and access is granted.
✨ Features
- Real-time face detection & recognition from a webcam / IP camera
- Add new authorized faces with a single command
- Hardware-agnostic: works with no hardware (simulation), Raspberry Pi GPIO relay, Arduino over serial, or MQTT (ESP32 / smart home)
- Everything is controlled via one
config.yaml, no code editing needed - Docker support, so dependency issues (dlib/cmake) disappear
- Runs on Windows, Linux, macOS, and Raspberry Pi
🚀 Quick Start (Simulation mode, no hardware needed)
git clone https://github.com/your-username/face-door-lock.git
cd face-door-lock

pip install -r requirements.txt

# Register your face (SPACE to capture, ESC to cancel)
python add_face.py YourName

# Run the system
python face_door_lock.py
That's it, your webcam window will open. Show your face: if it matches, you'll see "Access Granted" printed in the console (door "unlocks" in simulation). Anyone else's face will show "Access Denied".
Press q in the video window to quit.
🐳 Even Easier: Run with Docker
No need to fight with dlib/cmake install issues:
docker build -t face-door-lock .
docker run --device=/dev/video0 -it face-door-lock
Note: on Windows/Mac, passing a webcam into Docker is trickier, Docker on Linux (including Raspberry Pi OS) works best for this.
⚙️ Configuration (config.yaml)
Everything is controlled from one file, you never need to touch the Python code.
| Setting | What it does |
|---|---|
camera_source |
0 for default webcam, or a URL for an IP/phone camera |
match_tolerance |
Lower = stricter match, Higher = looser match (default 0.5) |
unlock_duration_seconds |
How long the door stays open after a match |
cooldown_seconds |
Minimum time between two unlock triggers |
lock_type |
none, gpio_relay, arduino_serial, or mqtt |
Using your phone as the camera (free, no extra hardware)
Install the IP Webcam app (Android) or similar, start the server, then
set in config.yaml:
camera_source: "http://<phone-ip>:8080/video"
🔌 Hardware Options
Option A: No hardware (testing / demo)
lock_type: "none"
Just prints Access Granted / Denied to the console. Good for trying the project out or for a portfolio/demo.
Option B: Raspberry Pi + Relay + Electric Lock (recommended for a real door)
Approx. parts cost: Raspberry Pi ($25 to $40) + USB/Pi camera ($5 to $10) +
5V relay module ($1 to $2) + 12V electric door strike / solenoid lock
($10 to $20) + power adapter.
Wiring:
Raspberry Pi GPIO 18  ---->  Relay IN
Relay COM/NO          ---->  12V Lock power line
5V + GND              ---->  Relay VCC + GND
lock_type: "gpio_relay"
gpio_pin: 18
Install extra dependency: pip install RPi.GPIO
Option C: Arduino (any lock/servo Arduino controls)
Connect Arduino via USB, upload a simple sketch that listens for "UNLOCK"
and "LOCK" strings on Serial and drives a relay/servo accordingly.
lock_type: "arduino_serial"
serial_port: "/dev/ttyUSB0"   # Windows: "COM3"
baud_rate: 9600
Install extra dependency: pip install pyserial
Option D: MQTT (wireless / ESP32 / smart home)
Good if you want the camera (running this Python script) and the actual lock (e.g. an ESP32 near the door) to be physically separate and talk over WiFi.
lock_type: "mqtt"
mqtt_broker: "localhost"
mqtt_port: 1883
mqtt_topic: "door/lock"
Install extra dependency: pip install paho-mqtt
👤 Adding / Removing Authorized Faces
Add a face:
python add_face.py Ahmed
This opens your webcam, saves a photo to known_faces/Ahmed.jpg, and
clears the cache so it's picked up next run.
Remove a face: just delete the corresponding .jpg from
known_faces/ and delete encodings.pkl (it will be rebuilt
automatically).
🔒 Privacy note: the
known_faces/folder andencodings.pklare already in.gitignore, your face photos will never be accidentally pushed to GitHub.
🛠️ Troubleshooting
| Problem | Fix |
|---|---|
dlib/face_recognition fails to install |
Use the Docker setup instead, it avoids all build tool issues |
RuntimeError: Unsupported image type, must be 8bit gray or RGB image. |
This is a numpy/opencv/dlib version conflict, not an image problem. Run pip uninstall opencv-python numpy -y then reinstall the exact pinned versions in requirements.txt (numpy==1.26.4, opencv-python==4.9.0.80). Delete encodings.pkl and retry. |
dlib install crashes / hangs on Windows |
Don't run pip install dlib directly (it compiles from source). Download a precompiled .whl matching your exact Python version from z-mahmud22/Dlib_Windows_Python3.x and install with pip install dlib-<version>-<tag>-win_amd64.whl |
Very slow pip install on a slow connection |
Add --timeout 300 to pip commands, or download the .whl manually from pypi.org ("Download files" tab, pick the file matching your Python version + win_amd64) and install with pip install <file>.whl |
ModuleNotFoundError after everything was installed |
Your virtual environment isn't activated. Run <env-path>\Scripts\Activate.ps1 (Windows) or source <env-path>/bin/activate (Mac/Linux) before running the script; this must be done every time you open a new terminal |
| Camera not found | Try camera_source: 1 or 2 in config.yaml, or check camera permissions |
| Recognizes wrong person / too loose | Lower match_tolerance (e.g. 0.4) |
| Doesn't recognize valid face | Raise match_tolerance slightly (e.g. 0.55), or add a couple more reference photos of that person |
| Slow / laggy on Raspberry Pi | Use Pi 4 or better; reduce camera resolution |
Traceback ending in KeyboardInterrupt |
Harmless, happens if you close with Ctrl+C in the terminal instead of pressing q in the video window. Always quit with q for a clean shutdown. |
📁 Project Structure
face-door-lock/
├── face_door_lock.py     # main script - run this
├── add_face.py            # helper to register new faces
├── lock_controller.py     # hardware abstraction layer
├── config.yaml            # all settings live here
├── requirements.txt
├── Dockerfile
├── known_faces/            # your registered face photos (gitignored)
└── README.md
⚠️ Disclaimer
This is a hobby/educational project. Face recognition is not a substitute for a certified security system, lighting, photos, and similar-looking people can cause false matches. Don't rely on this alone for high-security applications.
📄 License
MIT, free to use, modify, and share. Contributions and PRs welcome!
Comments