
WordPress Vulnerability Scanner & Exploitation Framework
Features • Installation • Usage • CVEs • Support
A comprehensive WordPress vulnerability scanner and exploitation framework for authorized penetration testing. This tool automatically detects and exploits multiple WordPress security vulnerabilities (CVEs) to help security professionals identify and patch weaknesses.
 /$$      /$$                     /$$       /$$             /$$
| $$$    /$$$                    | $$      |__/            | $$
| $$$$  /$$$$  /$$$$$$   /$$$$$$ | $$$$$$$  /$$  /$$$$$$$ /$$$$$$    /$$$$$$
| $$ $$/$$ $$ /$$__  $$ /$$__  $$| $$__  $$| $$ /$$_____/|_  $$_/   /$$__  $$
| $$  $$$| $$| $$$$$$$$| $$  \ $$| $$  \ $$| $$|  $$$$$$   | $$    | $$  \ $$
| $$\  $ | $$| $$_____/| $$  | $$| $$  | $$| $$ \____  $$  | $$ /$$| $$  | $$
| $$ \/  | $$|  $$$$$$$| $$$$$$$/| $$  | $$| $$ /$$$$$$$/  |  $$$$/|  $$$$$$/
|__/     |__/ \_______/| $$____/ |__/  |__/|__/|_______/    \___/   \______/
                       | $$
                       | $$ version 0.1
                       |__/
📋 Table of Contents
- Legal Disclaimer
- Features
- Screenshots
- Supported Vulnerabilities
- Requirements
- Installation
- Configuration
- Usage
- Output
- Advanced Usage
- Troubleshooting
- Contributing
- Contact & Support
⚠️ LEGAL DISCLAIMER
WARNING: This tool is for authorized penetration testing only.
This toolkit should only be used on systems you own or have explicit written permission to test. Unauthorized access to computer systems is illegal and violates the Computer Fraud and Abuse Act (CFAA) and similar laws worldwide. The author assumes no liability for misuse or damage caused by this tool. Users are responsible for ensuring they have proper authorization before running any exploits.
✨ Features
✅ Multi-CVE Support - Exploits 22+ WordPress vulnerabilities across different versions ✅ Mass Scanning - Scan multiple targets simultaneously using thread pooling ✅ Single Target Mode - Focus on individual WordPress installations ✅ Automatic Detection - Identifies vulnerable WordPress plugins and themes ✅ Shell Upload - Uploads web shells for post-exploitation access ✅ Credential Management - Creates admin accounts and captures passwords ✅ Result Logging - Saves shells, credentials, and exploit results ✅ Anti-Detection - Randomized headers, user agents, and request patterns ✅ Proxy Support - Route requests through proxies for anonymity ✅ Configuration Management - Persistent settings via JSON config
Screenshots
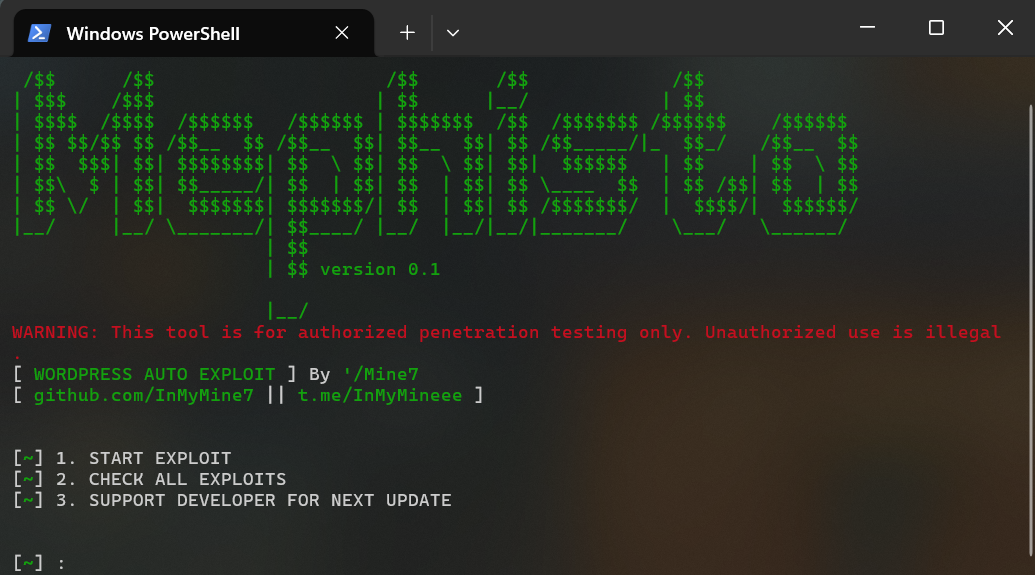
🖥️ Main Menu Interface
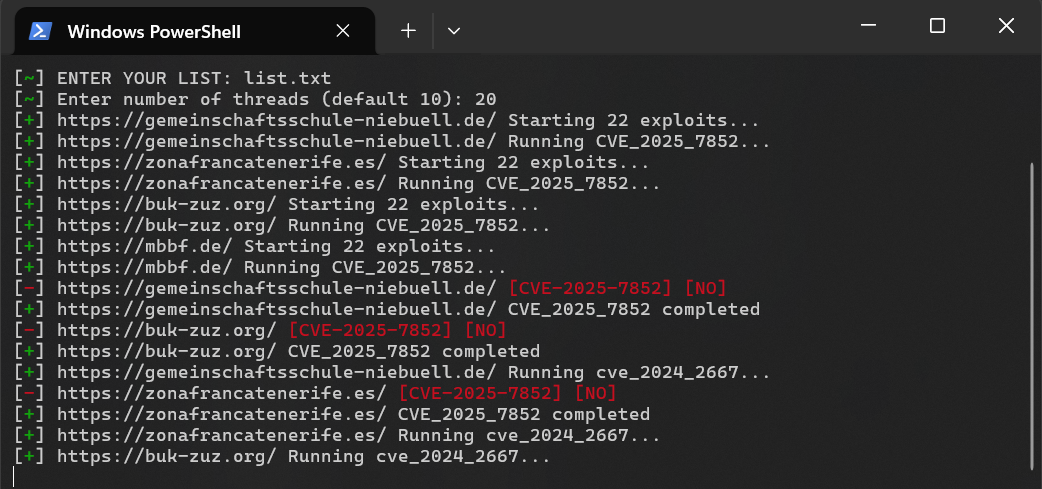
⚙️ Exploitation in Progress
Supported Vulnerabilities
The tool currently exploits the following CVEs:
| No. | CVE ID | Vulnerability Type | Year |
|---|---|---|---|
| 1 | CVE-2021-25094 | WordPress Plugin Vulnerability | 2021 |
| 2 | CVE-2023-5360 | Arbitrary File Upload | 2023 |
| 3 | CVE-2024-2667 | Authentication Bypass | 2024 |
| 4 | CVE-2024-9234 | Remote Code Execution | 2024 |
| 5 | CVE-2024-56064 | SQL Injection | 2024 |
| 6 | CVE-2025-4334 | CSRF Token Bypass | 2025 |
| 7 | CVE-2025-4606 | Privilege Escalation | 2025 |
| 8 | CVE-2025-5394 | Unauthenticated File Upload | 2025 |
| 9 | CVE-2025-6389 | Admin Panel Bypass | 2025 |
| 10 | CVE-2025-6440 | Cross-Site Request Forgery | 2025 |
| 11 | CVE-2025-6934 | Remote File Inclusion | 2025 |
| 12 | CVE-2025-7441 | SQL Injection | 2025 |
| 13 | CVE-2025-7852 | Authentication Bypass | 2025 |
| 14 | CVE-2025-13374 | Arbitrary File Upload | 2025 |
| 15 | CVE-2025-15403 | User Enumeration | 2025 |
| 16 | CVE-2025-29009 | Object Injection | 2025 |
| 17 | CVE-2025-47539 | Permission Escalation | 2025 |
| 18 | CVE-2025-48148 | Insecure Deserialization | 2025 |
| 19 | CVE-2026-0740 | Plugin Vulnerability | 2026 |
| 20 | CVE-2026-0920 | Theme Vulnerability | 2026 |
| 21 | CVE-2026-1357 | Admin Enumeration | 2026 |
| 22 | CVE-2026-3891 | Backdoor Installation | 2026 |
Requirements
- Python 3.8+ or newer
- Required Python Packages:
requests- HTTP client libraryurllib3- HTTP client with connection poolingbeautifulsoup4- HTML/XML parsingcolorama- Cross-platform colored terminal output
🚀 Quick Start
# 1. Clone repository
git clone https://github.com/InMyMine7/Mephisto
cd Mephisto

# 2. Install dependencies
pip install -r requirements.txt

# 3. Prepare payload files
mkdir -p lib
# Add inmymine-shell.jpg and mem.zip to lib/

# 4. Run the tool
python main.py
Installation
Prerequisites
Before starting, ensure you have:
- Python 3.8 or higher installed
- Git installed
- Internet connection for downloading dependencies
- At least 100MB free disk space
🪟 Windows Installation
Step 1: Install Python
- Download Python from python.org
- During installation, check "Add Python to PATH"
- Click "Install Now"
- Verify installation:
python --version
Step 2: Install Git (Optional but Recommended)
- Download from git-scm.com
- Run installer and follow prompts
- Verify installation:
git --version
Step 3: Clone Repository
Option A: Using Git (Recommended)
git clone https://github.com/InMyMine7/Mephisto
cd Mephisto
Option B: Manual Download
- Visit GitHub Repository
- Click "Code" → "Download ZIP"
- Extract ZIP file
- Open command prompt in extracted folder
Step 4: Install Dependencies
pip install -r requirements.txt
Step 5: Prepare Payload Files
mkdir lib
# Copy inmymine-shell.jpg and mem.zip to the lib\ folder
Step 6: Run the Tool
python main.py
🐧 Linux Installation
Step 1: Update System
Ubuntu/Debian:
sudo apt update
sudo apt upgrade -y
Fedora/RHEL:
sudo dnf update -y
Arch Linux:
sudo pacman -Syu
Step 2: Install Python & Dependencies
Ubuntu/Debian:
sudo apt install -y python3 python3-pip python3-venv git
Fedora/RHEL:
sudo dnf install -y python3 python3-pip git
Arch Linux:
sudo pacman -S python python-pip git
Step 3: Verify Installation
python3 --version
pip3 --version
git --version
Step 4: Clone Repository
git clone https://github.com/InMyMine7/Mephisto
cd Mephisto
Step 5: Create Virtual Environment (Recommended)
python3 -m venv venv
source venv/bin/activate  # On Linux
Step 6: Install Python Dependencies
pip install -r requirements.txt
Step 7: Prepare Payload Files
mkdir -p lib
# Copy inmymine-shell.jpg and mem.zip to lib/ folder
chmod +x main.py  # Make script executable
Step 8: Run the Tool
python3 main.py
🍎 macOS Installation
Step 1: Install Homebrew (if not installed)
/bin/bash -c "$(curl -fsSL https://raw.githubusercontent.com/Homebrew/install/HEAD/install.sh)"
Step 2: Install Python & Dependencies
brew install [email protected] git
Step 3: Verify Installation
python3 --version
pip3 --version
git --version
Step 4: Clone Repository
git clone https://github.com/InMyMine7/Mephisto
cd Mephisto
Step 5: Create Virtual Environment
python3 -m venv venv
source venv/bin/activate
Step 6: Install Dependencies
pip install -r requirements.txt
Step 7: Prepare Payload Files
mkdir -p lib
# Copy inmymine-shell.jpg and mem.zip to lib/ folder
chmod +x main.py
Step 8: Run the Tool
python3 main.py
🐳 Docker Installation (Optional)
If you prefer using Docker:
Create a Dockerfile:
FROM python:3.11-slim

WORKDIR /app

COPY requirements.txt .
RUN pip install --no-cache-dir -r requirements.txt

COPY . .

CMD ["python", "main.py"]
Build and Run:
docker build -t inmymine7 .
docker run -it -v $(pwd)/Result:/app/Result inmymine7
Troubleshooting Installation
| Issue | Solution |
|---|---|
| "python: command not found" | Make sure Python is in PATH, or use python3 |
| "Permission denied" on Linux | Run chmod +x main.py |
| "pip: command not found" | Use pip3 instead of pip |
| Module import errors | Run pip install -r requirements.txt --force-reinstall |
| No module named 'lib' | Make sure you're in the Mephisto directory |
1. Clone the Repository
git clone https://github.com/InMyMine7/Mephisto
cd Mephisto
2. Install Dependencies
pip install -r requirements.txt
3. Prepare Required Files
Create the lib/ directory with the necessary payload files:
mkdir -p lib
# Place inmymine-shell.jpg and mem.zip in the lib directory
These files are required for exploitation and should be placed in the lib/ directory before running the tool.
⚙️ Configuration
Edit config.json to customize the tool's behavior:
{
    "TIMEOUT": 10,                          // Request timeout in seconds
    "UPLOAD_TIMEOUT": 15,                   // File upload timeout
    "FILES_DIR": "lib",                     // Directory containing payloads
    "REQUIRED_FILES": [                     // Files required for exploitation
        "inmymine-shell.jpg",
        "mem.zip"
    ],
    "RESULT_DIR": "Result",                 // Output directory for results
    "SHELLS_FILE": "Shells.txt",            // Log file for uploaded shells
    "PASSWORDS_FILE": "password_change.txt", // Log file for changed passwords
    "ADMINS_FILE": "wp-admin.txt",          // Log file for admin accounts
    "REGISTER_FILE": "wp-register.txt",     // Log file for registrations
    "UPDATE_URL": "https://...",            // URL for version updates
    "SUPPORT_URL": ["https://..."],         // Support/donation links
    "EMAIL": "[email protected]"          // Default email for operations
}
💻 Usage
Run the Application
python main.py
Main Menu Options
🎯 Option 1: Start Exploit
Choose between single target or mass scanning:
Single Target Scan:
[~] Masukkan target URL: https://target-wordpress.com
[~] Enter number of threads (default 10): 5
Mass Target Scan:
[~] ENTER YOUR LIST: targets.txt
[~] Enter number of threads (default 10): 20
The tool will run all 22+ exploits against the target(s) and log successful results.
✅ Option 2: Check All Exploits
Reviews the available exploits and their status without executing them.
💰 Option 3: Support Developer
Displays links for supporting the development of this tool.
📋 Input File Format (Mass Scanning)
Create a targets.txt file with one URL per line:
https://wordpress-site1.com
https://wordpress-site2.com
https://wordpress-site3.com
Then run the tool and select option 1 for mass scanning, providing the file path when prompted.
📊 Output
Results are stored in the Result/ directory:
| File | Description |
|---|---|
| 📄 Shells.txt | Uploaded web shell URLs and access credentials |
| 🔐 password_change.txt | Modified admin passwords |
| 👤 wp-admin.txt | Created admin accounts |
| 📝 wp-register.txt | Registered user accounts |
Each line contains the target URL and relevant exploitation data in CSV format.
🛡️ Anti-Detection Features
The tool includes several evasion techniques to avoid detection:
| Feature | Description |
|---|---|
| 🔀 Randomized User Agents | 8 different browser identifications |
| 📋 Random Headers | Varies HTTP headers per request |
| 🍪 Randomized Cookies | Generates unique session identifiers |
| ⏱️ Request Delays | Implements random delays between requests |
| 🌐 Browser Simulation | Mimics legitimate browser navigation patterns |
| 🔗 Proxy Support | Routes traffic through proxy servers |
| 🗣️ Accept-Language Rotation | Uses multiple language preferences |
| 🔄 Referer Randomization | Varies referrer headers |
📊 Logging
All operations are logged with color-coded output:
- 🟢 Green [+] - Successful exploitation
- 🔴 Red [-] - Failed attempt
- ⚠️ Red [!] - Error or warning
📁 Project Structure
Mephisto/
├── main.py           # Main exploit orchestrator
├── config.json            # Configuration file
├── requirements.txt       # Python dependencies
├── README.md              # This file
├── lib/
│   ├── tools/
│   │   ├── exploit_cve_2021_25094.py
│   │   ├── exploit_cve_2023_5360.py
│   │   ├── exploit_cve_2024_2667.py
│   │   ├── ... (22+ exploit modules)
│   ├── inmymine-shell.jpg (required)
│   └── mem.zip           (required)
└── Result/               # Output directory
    ├── Shells.txt
    ├── password_change.txt
    ├── wp-admin.txt
    └── wp-register.txt
🔧 Advanced Usage
🔗 Using with Proxies
To add proxy support, modify the PROXIES list in main.py:
PROXIES = [
    'http://proxy1.com:8080',
    'http://proxy2.com:8080',
    'http://proxy3.com:8080',
]
The tool will randomly select from available proxies for each request, improving anonymity.
🛠️ Customizing Exploits
Each exploit module in lib/tools/ can be modified or new exploits added by following the existing pattern and registering them in the EXPLOITS dictionary in main.py:
EXPLOITS = {
    'CVE_XXXX_XXXX': 'lib.tools.exploit_cve_xxxx_xxxx.exploit_function',
    # Add your custom exploits here
}
⚡ Rate Limiting
Adjust the threading/pooling count to control request rate:
[~] Enter number of threads (default 10): 1  # For slower, stealthier scans
[~] Enter number of threads (default 10): 50 # For faster, aggressive scans
Recommended Values:
1-5: Stealth mode (slow but undetectable)10-20: Balanced mode (normal speed)20+: Aggressive mode (fast but may trigger IDS/WAF)
Troubleshooting
❌ "File not found" Error
Problem: Tool complains about missing files
Solution: Ensure inmymine-shell.jpg and mem.zip are in the lib/ directory.
⏱️ Connection Timeout
Problem: Requests are timing out Solutions:
- Increase
TIMEOUTvalue inconfig.json - Check your internet connection
- Verify the target URL is correct
- Try reducing number of threads
📦 Import Errors
Problem: Missing Python modules Solution: Reinstall dependencies:
pip install -r requirements.txt --force-reinstall
💾 Results Not Saving
Problem: Output files not being created
Solution: Ensure the Result/ directory exists with write permissions:
mkdir -p Result
chmod 755 Result
❓ Frequently Asked Questions (FAQ)
Q: Is this tool legal? A: This tool is for authorized penetration testing only. Ensure you have explicit written permission before testing any system.
Q: Can I use this against any WordPress site? A: Only use this against systems you own or have written permission to test. Unauthorized access is illegal.
Q: How do I avoid detection? A: Use proxies, adjust thread count, and enable anti-detection features. See Anti-Detection Features.
Q: Why are my exploits failing? A: Check if the WordPress version is vulnerable, ensure required files are present, and verify network connectivity.
Q: Can I add new CVEs?
A: Yes! Create a new exploit module in lib/tools/ and register it in the EXPLOITS dictionary.
Q: What's the difference between single and mass scanning? A: Single mode tests one target, mass mode processes multiple targets from a file using thread pools.
Performance Tips
- Threading - Start with 10 threads, increase for faster scanning
- Timeouts - Reduce timeouts for faster failure detection
- Batch Size - For mass scanning, process targets in groups
- Network - Use local network for faster, more reliable exploits
Version History
| Version | Date | Changes |
|---|---|---|
| v0.1 | 2026-05-01 | Initial release with 22+ WordPress CVE exploits |
📞 Contact & Support
Have questions or want to support development? Reach out!
🤝 Contributing
Contributions are welcome! To add new exploits or improve existing ones:
- Fork the repository
- Create a new exploit module in
lib/tools/ - Follow the naming convention:
exploit_CVE_XXXX_XXXX.py - Register the exploit in the
EXPLOITSdictionary inmain.py - Test thoroughly before submitting a pull request
- Submit your PR with a clear description
Contribution Guidelines
- Write clean, documented code
- Include error handling
- Test all functionality
- Update README if adding new features
📜 License
This project is provided for educational and authorized security testing purposes only.
Users are solely responsible for ensuring they have proper authorization before testing any systems. The author assumes NO LIABILITY for any misuse, damage, or illegal activities.
⚠️ Legal Disclaimer
This tool should ONLY be used for:
- ✅ Authorized penetration testing
- ✅ Security research on owned systems
- ✅ Educational purposes with proper permissions
NOT for:
- ❌ Unauthorized system access
- ❌ Illegal hacking activities
- ❌ Damage to systems without permission
By using this tool, you acknowledge that you understand and accept these terms.
Made with ❤️ by InMyMine7 Disclaimer: This tool is for authorized testing only. Unauthorized access is illegal.
Comments