How To Install reNgine on Windows with Docker Desktop

What is reNgine?
reNgine is your go-to web application reconnaissance suite that’s designed to simplify and streamline the reconnaissance process for security professionals, penetration testers, and bug bounty hunters. With its highly configurable engines, data correlation capabilities, continuous monitoring, database-backed reconnaissance data, and an intuitive user interface, reNgine redefines how you gather critical information about your target web applications.
Traditional reconnaissance tools often fall short in terms of configurability and efficiency. reNgine addresses these shortcomings and emerges as a excellent alternative to existing commercial tools.
reNgine was created to address the limitations of traditional reconnaissance tools and provide a better alternative, even surpassing some commercial offerings. Whether you’re a bug bounty hunter, a penetration tester, or a corporate security team, reNgine is your go-to solution for automating and enhancing your information-gathering efforts.
reNgine is not an ordinary reconnaissance suite; it’s a game-changer! With the 2.0 release we’ve turbocharged the traditional workflow with groundbreaking features that is sure to ease your reconnaissance game. reNgine redefines the art of reconnaissance!
? Workflow
⭐ Features
reNgine is packed with features that no any open other source tool provides. Here are some list of cool features supported by reNgine:
- Reconnaissance:
- Subdomain Discovery
- IP and Open Ports Identification
- Endpoints Discovery
- Directory/Files fuzzing
- Screenshot Gathering
- Vulnerability Scan
- Nuclei
- Dalfox XSS Scanner
- CRLFuzzer
- Misconfigured S3 Scanner
- WHOIS Identification
- WAF Detection
- OSINT Capabilities
- Meta info Gathering
- Employees Gathering
- Email Address gathering
- Google Dorking for sensitive info and urls
- Projects, create distinct project spaces, each tailored to a specific purpose, such as personal bug bounty hunting, client engagements, or any other specialized recon task.
- Perform Advanced Query lookup using natural language alike and, or, not operations
- Highly configurable YAML-based Scan Engines
- Support for Parallel Scans
- Support for Subscans
- Recon Data visualization
- LLM Vulnerability Description, Impact and Remediation generation
- LLM Attack Surface Generator
- LLM Toolkit to download and manage LLM models
- Multiple Roles and Permissions to cater a team’s need
- Customizable Alerts/Notifications on Slack, Discord, and Telegram
- Automatically report Vulnerabilities to HackerOne
- Recon Notes and Todos
- Clocked Scans (Run reconnaissance exactly at X Hours and Y minutes) and Periodic Scans (Runs reconnaissance every X minutes/- hours/days/week)
- Proxy Support
- Screenshot Gallery with Filters
- Powerful recon data filtering with autosuggestions
- Recon Data changes, find new/removed subdomains/endpoints
- Tag targets into the Organization
- Smart Duplicate endpoint removal based on page title and content length to cleanup the reconnaissance data
- Identify Interesting Subdomains
- Custom GF patterns and custom Nuclei Templates
- Edit tool-related configuration files (Nuclei, Subfinder, Naabu, amass)
- Add external tools from Github/Go
- Interoperable with other tools, Import/Export Subdomains/Endpoints
- Import Targets via IP and/or CIDRs
- Report Generation
- Toolbox: Comes bundled with most commonly used tools during penetration testing such as whois lookup, CMS detector, CVE lookup, etc.
- Identification of related domains and related TLDs for targets
- Find actionable insights such as Most Common Vulnerability, Most Common CVE ID, Most Vulnerable Target/Subdomain, etc.
- You can now use local LLMs for Attack surface identification and vulnerability description (NEW: reNgine 2.1.0)
- BountyHub, a central hub to manage your hackerone targets
source : https://rengine.wiki/
How To Install reNgine with Docker Desktop in Windows ?
first you need git on your windows machine, if you haven’t install and download git for windows in here https://git-scm.com/downloads/win
then clone the reNgine repository
git clone https://github.com/yogeshojha/rengine && cd renginenow edit the .env file with Visual Studio code or using Notepad
sample env is like this:
#
# General
#
COMPOSE_PROJECT_NAME=rengine

#
# SSL specific configuration
#
AUTHORITY_NAME=reNgine
AUTHORITY_PASSWORD=nSrmNkwT
COMPANY=reNgine
DOMAIN_NAME=recon.example.com
COUNTRY_CODE=US
STATE=Georgia
CITY=Atlanta

#
# Database configurations
#
POSTGRES_DB=rengine
POSTGRES_USER=rengine
POSTGRES_PASSWORD=hE2a5@K&9nEY1fzgA6X
POSTGRES_PORT=5432
POSTGRES_HOST=db

#
# Celery CONCURRENCY Autoscaling
# The number of CONCURRENCY defines how many scans will run in parallel
# Please always keep minimum of 5
#
MIN_CONCURRENCY=5
MAX_CONCURRENCY=30
or default project is have .env, let it be default , now i’m assume you are have docker dekstop here
Open cmd in current directory and type :
$ make certsit will run progress like this
$ make buildthat command will build the images inside the docker, just wait aroung 10-20 minutes,

after that , write another command to run the image or container
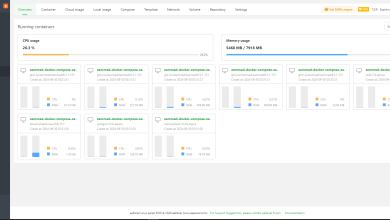
$ make upafter that then if container all running, then our reNgine is work well

just one command before running reNgine
$ make username
use whatever what you want, or just let it default
now access https://127.0.0.1/
you can see the login page

use your credentials, and now we can see this dashboard

use feature like scanning and vulnerability checker


Usually I do not read article on blogs however I would like to say that this writeup very compelled me to take a look at and do so Your writing taste has been amazed me Thanks quite nice post